/
Clients
Clients
- Copy Space for Confluence (Unlicensed)
- Kenny Teves
- Aaron Sakievich (Unlicensed)
- Laura White (Unlicensed)
Add a client to stay organized and to help you quickly find projects.
To add a client to a new project:
- Create the new project.
- Under Client Name,
- Click New to add a new client…
- …or scroll to select an existing client.
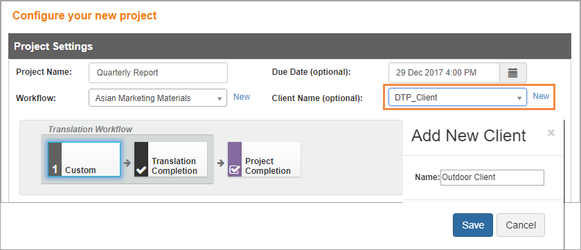
- The Client will be added to the project. You will be able to sort/find the project by client in the future.
Adding a Client to an Existing Project
To add a client to an existing project, start by creating the client and then adding it to the project.
Create the Client
To create a client:
- Go to the top of the page and select Project Resources > Clients.
- Click New Client.
- Type the name of the new client and click Save.
Add the Client
To add the client to the project:
- Open a project from the Projects menu.
- Click the project’s Settings tab (upper right).
- Under Project Details, click Edit.
- Scroll to select the new client.
Editing Client Names
If need to edit a client name, access the Client editing option from the main menu.
To edit a client name,
- Go to the main menu and select Project Resources > Clients.
- Click the name of the client you wish to edit.
- Switch to the Settings tab (above the list of projects).
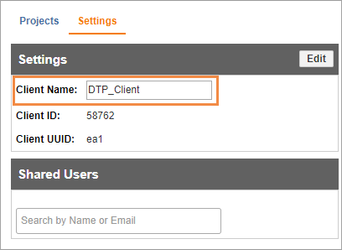
- Click Edit (upper right).
- Make your changes and click Save.
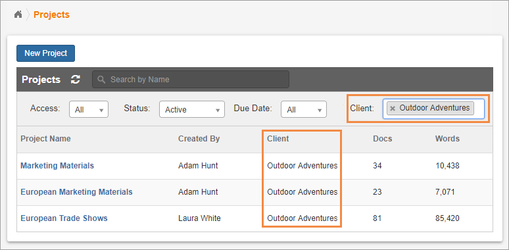
Viewing Client’s Projects
Once clients are added to a project, you will be able to organize projects by client.
To view all of the projects associated with a single client,
- Go to the main menu and select Project Resources > Clients.
- Click to select the client’s name.
- A list of all of the projects assigned to that client will display.
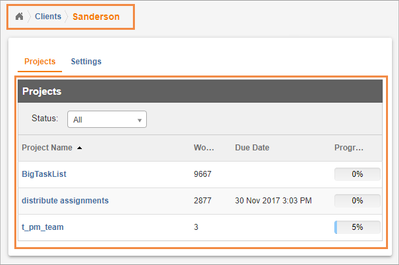
- Click a link to start managing a project.
Sharing Clients
When you add a client,
- Others can’t access the client under Project Resources > Clients.
- Others can’t add the client to new projects.
If you would like to share a Client with others, change the client permissions.
- Access Clients from the main menu.
Select Project Resources > Clients from the main menu. - Click the name of the client you wish to share.
- Switch to the Settings tab (above the list of projects).
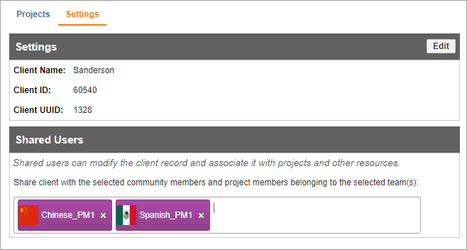
- Click Edit (upper right).
- Under Shared Users, type the name(s) of the Individual(s), team(s), and other groups that should have access to add the client.
- When you are ready, click Save.
Related content
Sharing Projects
Sharing Projects
More like this
Project Templates
Project Templates
More like this
Teams
More like this
Creating Project Templates
Creating Project Templates
More like this
Creating Projects and Documents
Creating Projects and Documents
More like this
Creating Projects
Creating Projects
More like this