/
Managing Translation Projects
Managing Translation Projects
- Aaron Sakievich (Unlicensed)
- Kenny Teves
Owned by Aaron Sakievich (Unlicensed)
Adding Target Languages to Translation Projects
The only setting we recommend you change once a Translation Project is in flight is adding new target languages. All of the other settings may have unintended consequences. Instead you should create a new translation project.
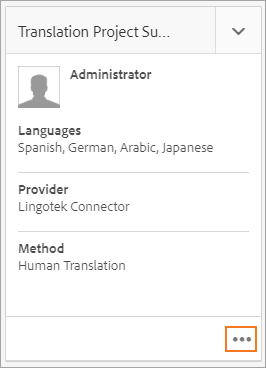
- Select the More icon the bottom right-hand corner of Translation Project Summary.
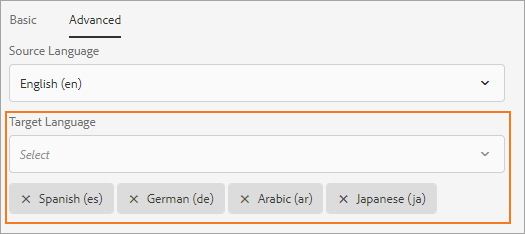
- Select Advanced.
- Under Target Language select the additional target languages you want to be able to select when creating new Translation Jobs.
Adding Translation Jobs
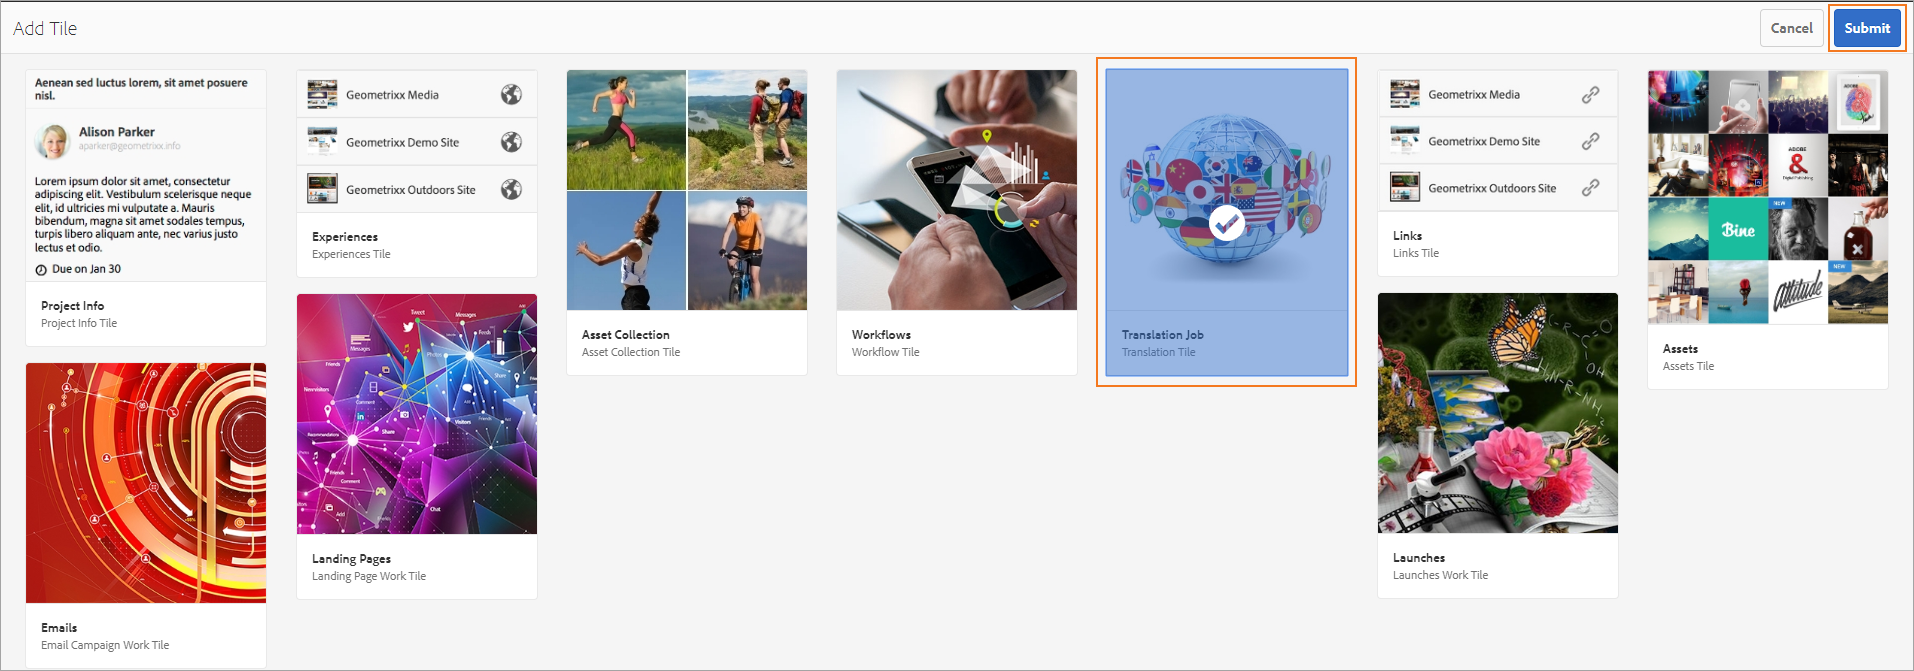
- Open the Translation Project you want to Add a new Translation Job to and select Add.
- Select Translation Job and click Submit.
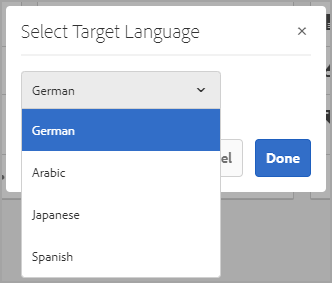
- On the new Translation Job tile choose the edit icon in the Target row.
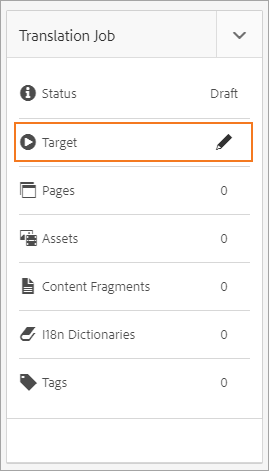
- Choose from the available targets in the Select Target Language modal.
Adding Content To Translation Jobs
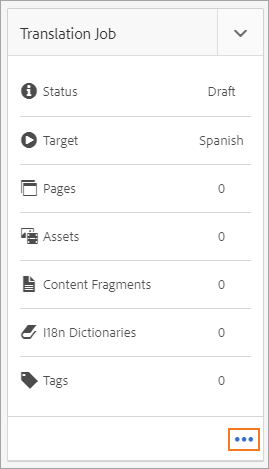
- Open the Translation Job by selecting the More icon in the bottom right-hand corner of the Translation Job tile.
- Select Add and choose from the following options:
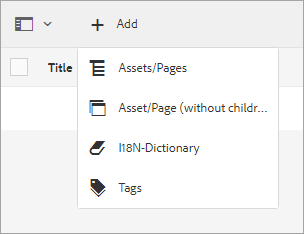
- Assets/Pages
- Asset/Page (without children)
- li8N-Dictionary
- Tags
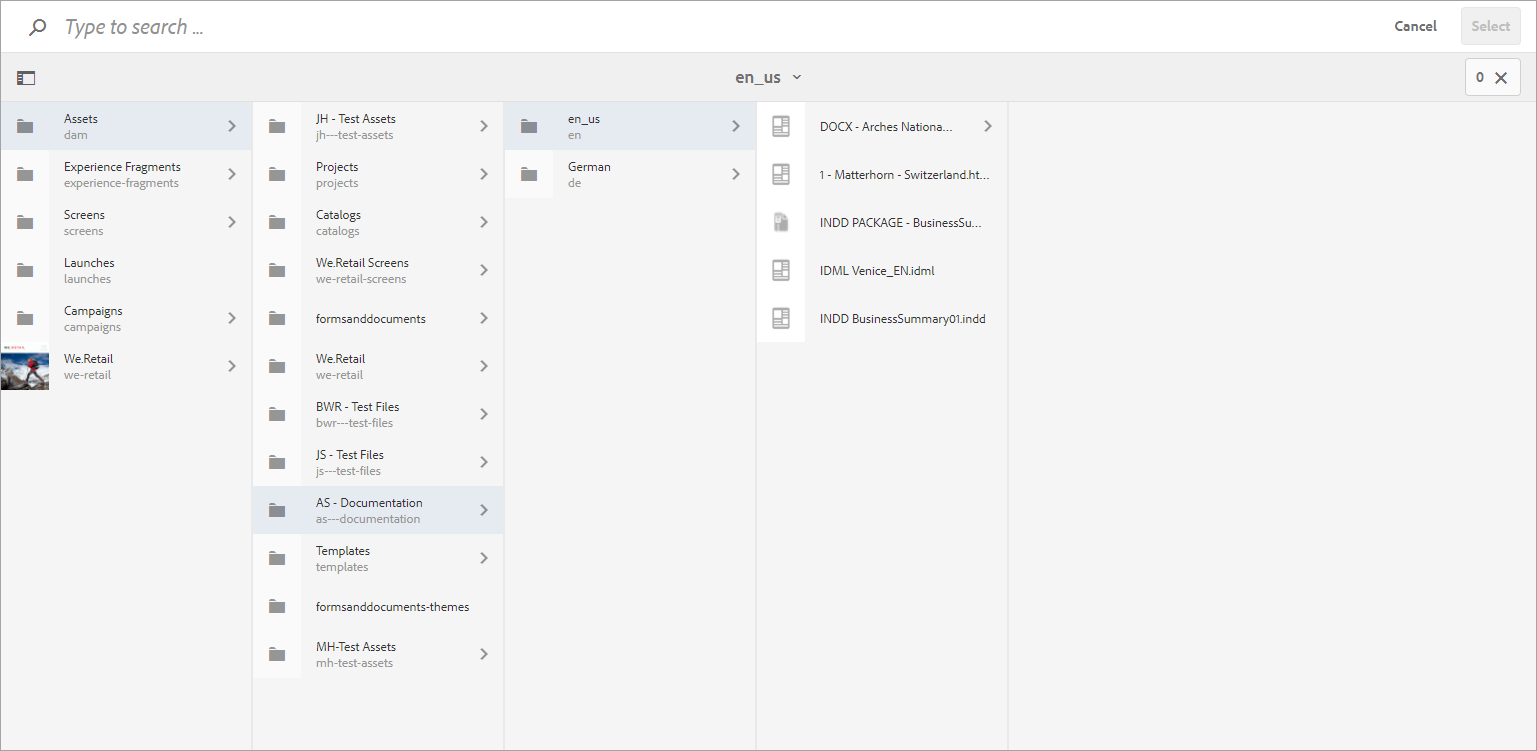
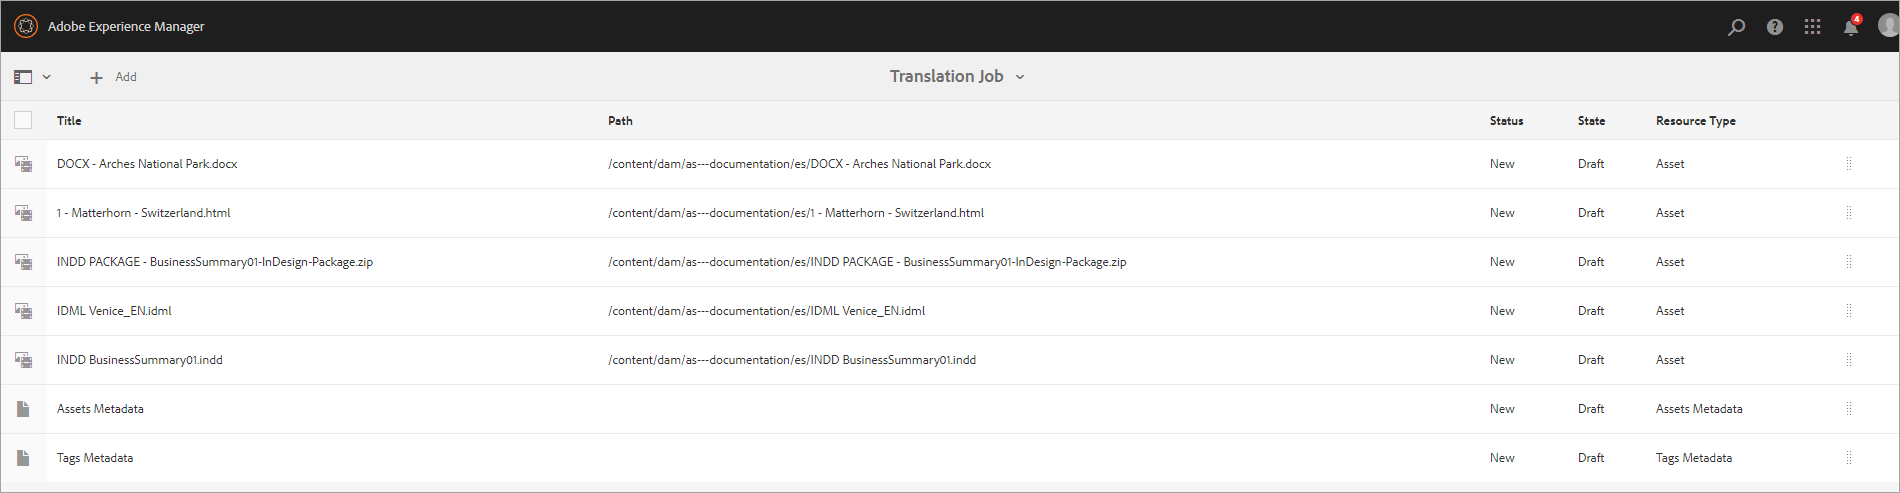
- Use the navigator to select content. If you selected Assets/Pages and then select a folder, all of the content in that folder and its subfolders will be added to the translation job. Click on Select when all of your content is selected.
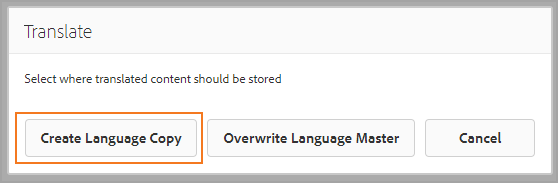
- The Translate modal will appear and you should always choose to create a language copy. This will create a matching folder structure as your source content and populate it with a copy of the source content until it is overwritten with the translated content.
- Your Translation job will display your source content and any relevant information.
Round-tripping Content
Now that you have created your translation project and populated your translation jobs, you can submit content to the Enterprise TMS for translation.
- Upload content in the Job to the Enterprise TMS by selecting the Start action.
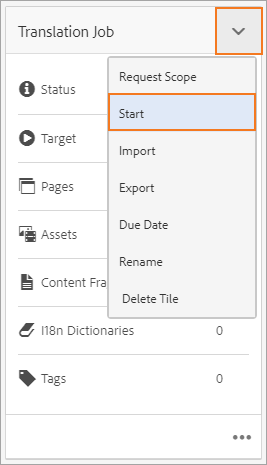
- The Status of the Translation Job will change to Translation in Progress.
- The content will then make its way through the translation workflow assigned to it by the profile you selected in your Translation Configuration.
- AEM will only reach out for a status update to the TMS in the Translation Project view. You cannot get a status update looking in the Translation Job. Once the translation status is update in the Translation Project view you can open the translation job and view the status of individual content.
- When your content is ready for review that means the workflow has completed in the Enterprise TMS and has been downloaded to AEM. Review your translations by:
- Revealing them in Assets and downloading the content.
- Revealing them in Sites and then preview them.
- If everything looks good, select Accept Translation and the state will change to Approved.
- When everything is approved in the Translation Job the Job's state will change to Approved.
- At that point you can complete the Translation Job and Archive it if desired. Archiving the job removes it from view in the Translation Project.