Linking Confluence
- Aaron Sakievich (Unlicensed)
- Kenny Teves
In Confluence
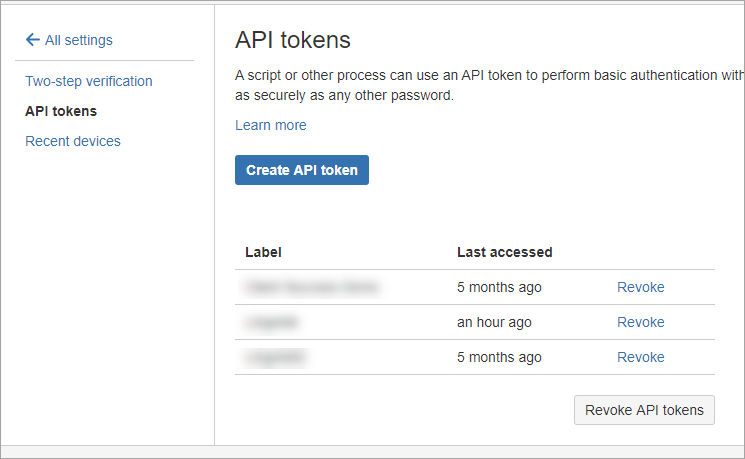
- Log into Confluence with your Atlassian Account and then go to https://id.atlassian.com/manage/api-tokens to create an API token.
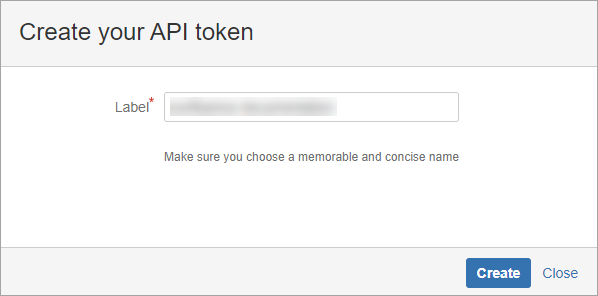
- Select the Create API token button and a modal will appear where you can set the label of your token.
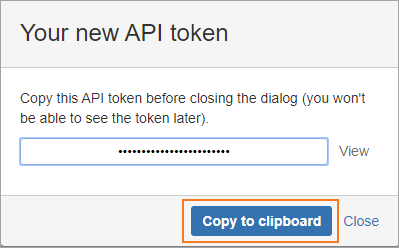
- You will then get a modal where you can copy your new API token. Be sure to copy that token to your clipboard and paste it somewhere you can access later.
- Select the Create API token button and a modal will appear where you can set the label of your token.
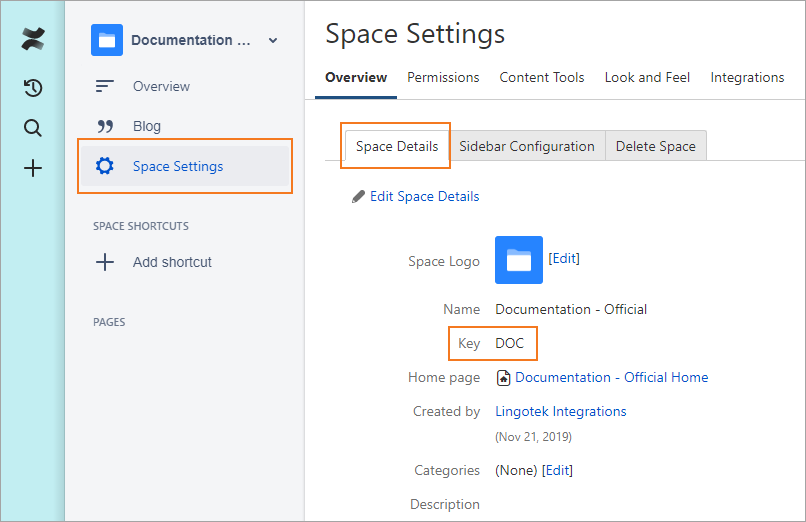
- Next you will need to find the space key.
- Select the space that you will be using as your source content.
Then select Settings > Space Details and you will see your Space Key below your Space Name.
Be sure to know the space name and space key of each space you want translated.
You will also need your Confluence URL and username.
It is recommended that the username you use is associated with a pseudo-user, not an individual as you may need to change an individual's permissions if there are personal/process changes. This will not prevent other Confluence users from using the Chrome extension if they are logged into your Confluence account.
You will need to create a space for each locale that you are translating your source space into. The translated content you download from the Enterprise TMS will be uploaded into these "Target Spaces."
Example
If you are translating a space called Documentation that is written in English, you may create a space called Documentación for your Spanish, Spain content.
In Enterprise's Marketplace app
Making the connection
- Log into the Enterprise Marketplace.
- Select the Product Menu.
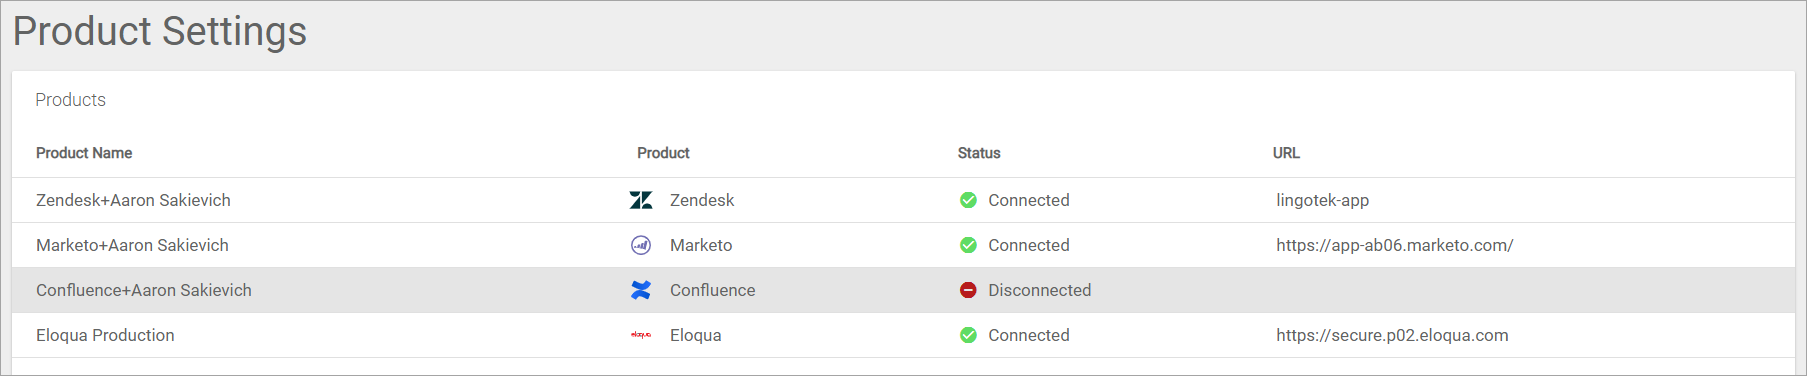
- After reaching out to support@lingotek.com you should see a subscription to a Confluence account.
- The new Confluence subscription will be disconnected.
- Click the disconnected Confluence Product line.
- On the next screen you will see inputs you should be able to fill out based on the information you have from Confluence.
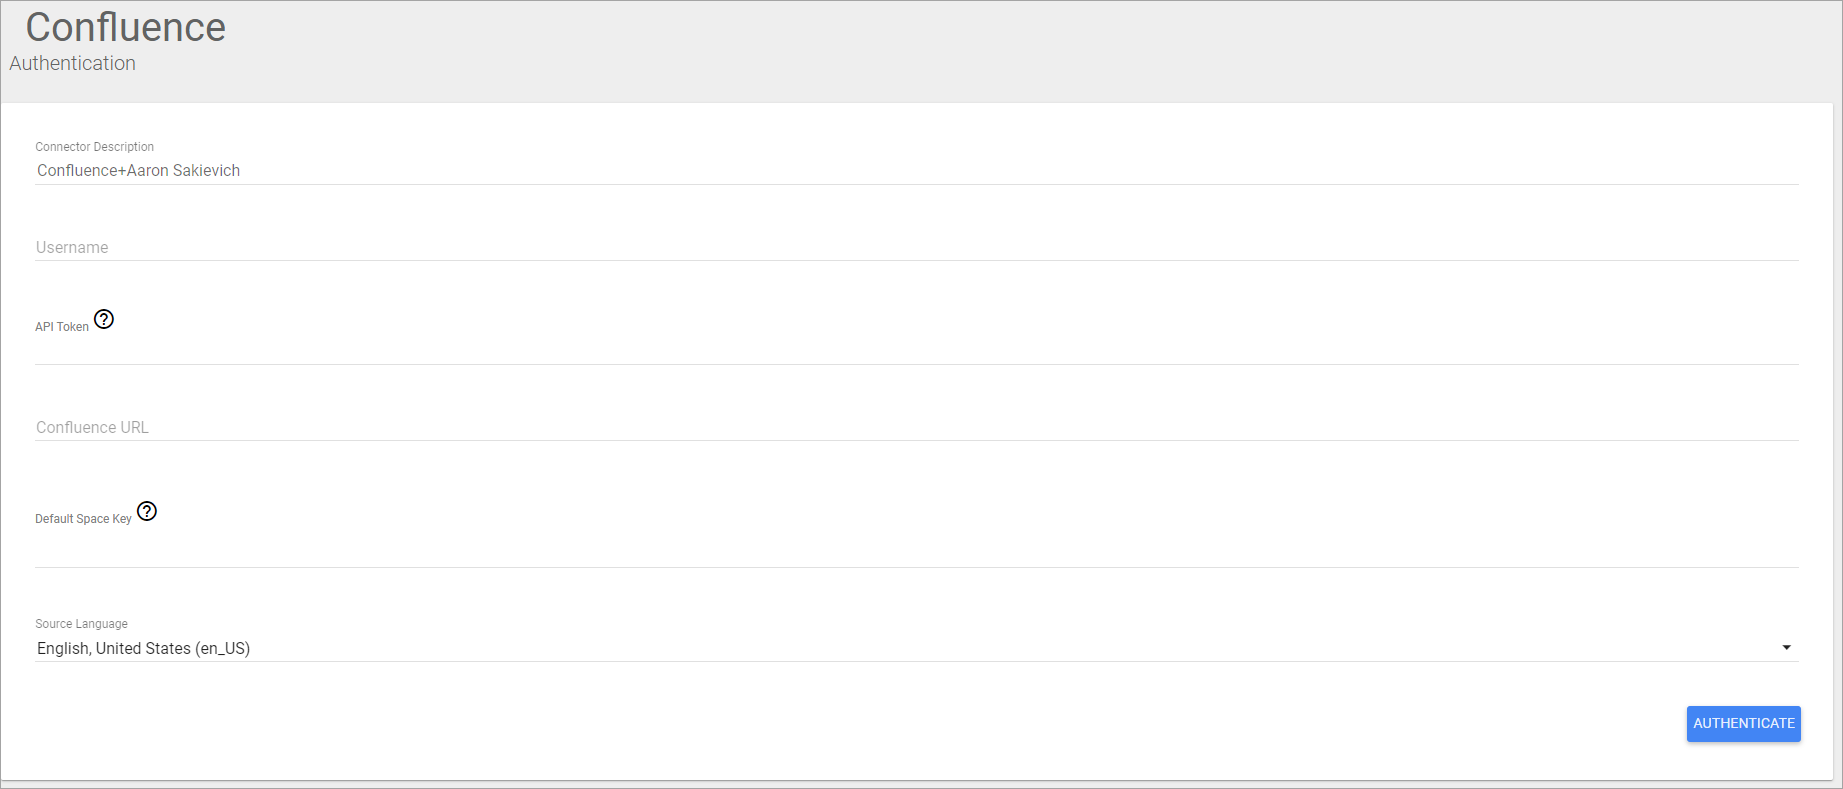
- Fill out those fields and select Authenticate.
- After successful authentication, you will be taken back to the Product Page and your Confluence subscription will be connected.
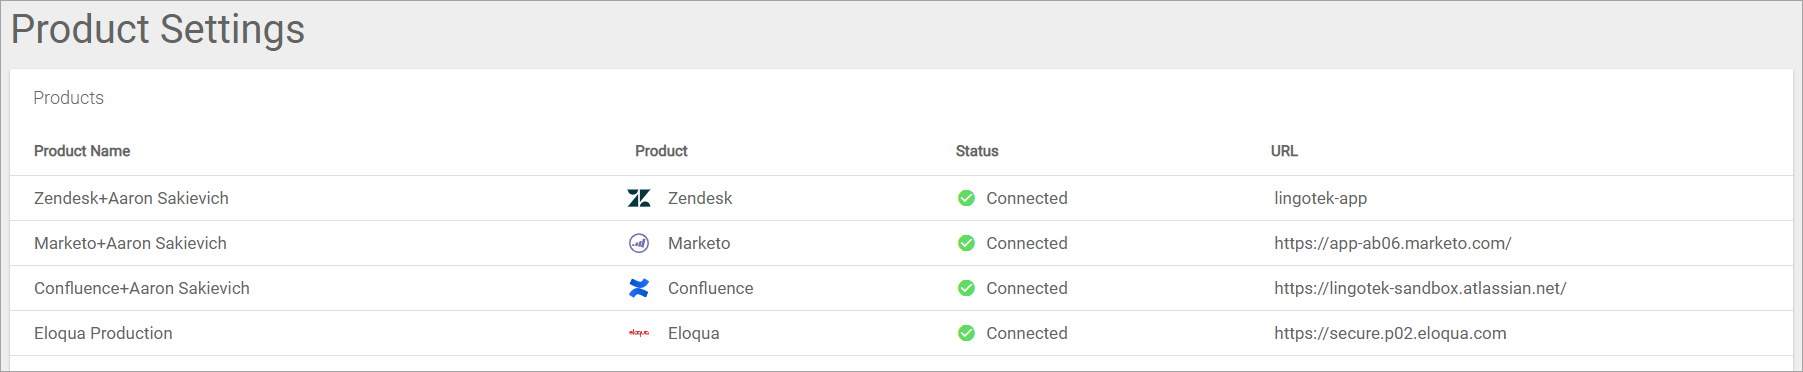
- Select your Confluence Subscription and complete your configuration.
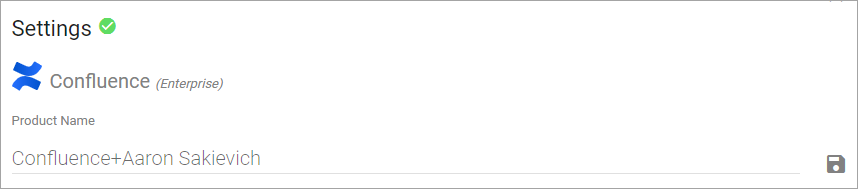
Configure Confluence Settings
- Log into Marketplace and go to the Products menu.
- Select the newly connected Confluence integration.
Select the pencil icon to give the product a name, then select the save icon.
This is helpful and recommended if you have multiple instances of Confluence that need a subscription.
Expand Confluence Connection and set up translation configurations for each space you want to translate.
You are also given a read-only view of the Confluence URL, Username, Default Space Key, and Source Language for your reference.
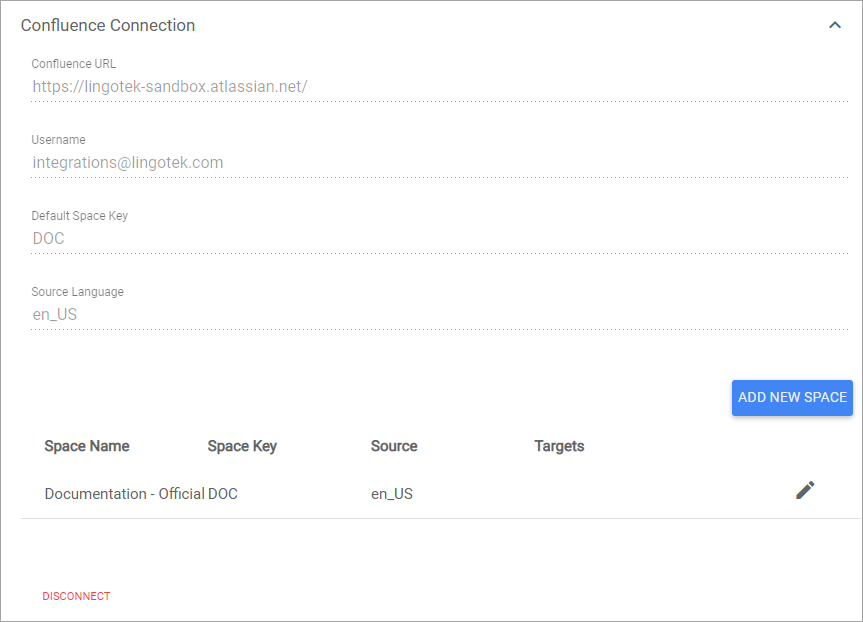
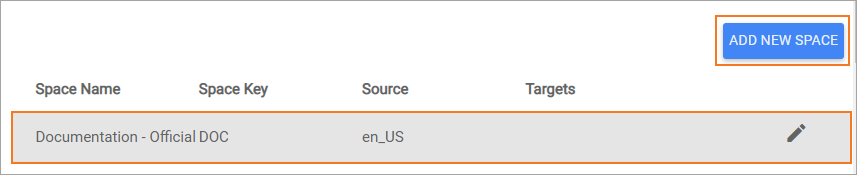
- Select the space you set up initially to determine which spaces your translated content should be added to. You can also manage these settings for multiple spaces. Select Add New Space to select another space with source content you want to be translated.
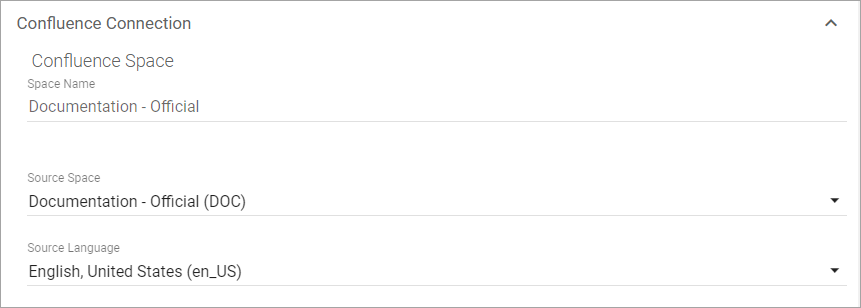
- Give the space a name to differentiate it from other spaces.
- Choose the Source Space.
- Choose the Source Language of your Source Space.
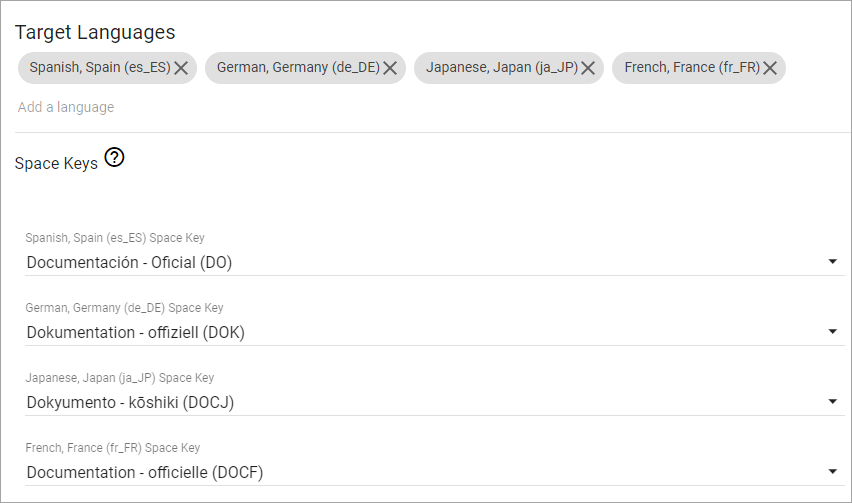
- Choose the targets you want that source to be translated into.
- You will need to assign a space to each target language. These should be blank spaces as they will be populated with translated content.
- Select the space you set up initially to determine which spaces your translated content should be added to. You can also manage these settings for multiple spaces. Select Add New Space to select another space with source content you want to be translated.
- Lock Targets in "Current" Status - Targets that reach the current status will be locked, preventing them from receiving any further updates from the TMS. This can be manually changed in the Enterprise Inside connector. This setting is global for all Translation Profiles.
Translation Profiles
Expand the Translation Profiles section. The automatic and manual profiles have already been created for you. To create a new profile you can select the plus next to the Add Profile header or you can simply modify the automatic and manual profiles.
The automatic and manual profiles are distinguished by the setting to automatically or manually download completed translations.
- Give the Profile a name to help your content managers distinguish the profile.
- Choose the targets that should be used with this translation profile. This allows you to prevent some languages from being used for specific content types.
Download - Choose if you want your content to download automatically or manually when they complete the translation process.
This setting cannot be adjusted for the automatic and manual profiles.
- Auto-Upload Settings – Choose to automatically upload untracked content at a regular interval.
- Project - Use the dropdown to select which project in the Enterprise TMS the Confluence content should be uploaded into.
- Workflow - Use the dropdown to select which workflow should be used to translate your Confluence content.
- Primary Filter - The FPRM filter that should be initially applied to your content
Secondary Filter - the FPRM filter should be applied to your content after the Primary filter.
It is highly recommended that you use the Confluence Default filters that are already selected in this drop-down. If your content needs special filters, please speak with support@lingotek.com.
- Document Metadata - Populating any of these fields will add that value to the corresponding metadata field in Enterprise upon upload.
- Select Save Changes.
- You can translate spaces differently by assigning them to different profiles. For example, you may want once space to get high-quality translation, and others, simple machine translation. All your spaces are assigned to the Automatic profile by default, but you can remove them from the automatic profile and move them to other profiles. If you do not want a space to receive translation, then do not assign it to a profile, and your content managers will not be able to upload it to the TMS.
User Manager
Open the User Manager panel. Use this panel to choose which of your community members should be able to use this integration to upload content from your connector. Simply add/remove users as necessary. Please note that you can only add users who have access to the Marketplace application.