Overview
Once you have chosen which languages you would like to use, you will be ready to translate your site.
Go to your site’s list of posts/pages.
Choose which content to translate (and then upload it to
Enterprise).
Request the translation and have a linguist complete it.
Download the completed translation to your WordPress site.
Getting Started
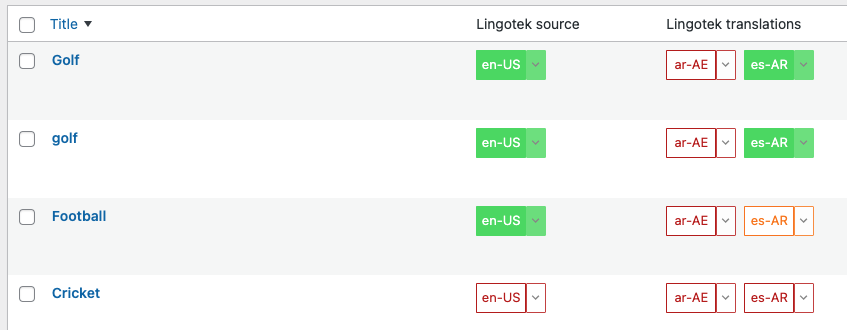
Once the plugin is installed, a small status icon will appear next to you will see colored chips appear for each translatable WordPress item.
This icon The chip will change color as the document moves through each step of the translation process.
![]()
Translation Icon Descriptions
Upload
This icon displays next to content that might need translation.
Click this icon to send the item to Lingotek.
This icon appears next to the source document once it has finished uploading to Lingotek.
| Note | ||
|---|---|---|
| ||
For best results, be sure the upload completes before requesting a translation. |
Click this icon to request translation into a specific language.
This icon appears while the translation is in progress. A translator can click this icon to open the item in the Translator Workbench.
The download icon appears when the translation is 100% complete. Click this icon to download the completed translation to your WordPress site.
Once a page/post is downloaded, you can go back and edit the translation by clicking the Edit icon.
An out of sync icon appears if an update is made to a page that was previously translated. Click the out of sync icon to request translations for this updated content.
Click an icon to complete the
Click the chip(s) to complete the steps listed above, or for many actions, use the Bulk Actions menu.
Whether you manage the translation with the document icons or with the Bulk Actions menu, be sure each item passes through the following steps:
![]() Between each step, be sure to refresh the page. You can do this by clicking or bulk-selecting “Update Translation Status.”
Between each step, be sure to refresh the page. You can do this by clicking or bulk-selecting “Update Translation Status.”
| Panel | ||
|---|---|---|
| ||
|
If you need to run the same action on many documents (e.g. Update Translation Status), you can speed the process by using the Bulk Actions menu.
Bulk Actions
To run a bulk action,
Click the checkbox at the very top of the list
(This will
to select all items on the page
.
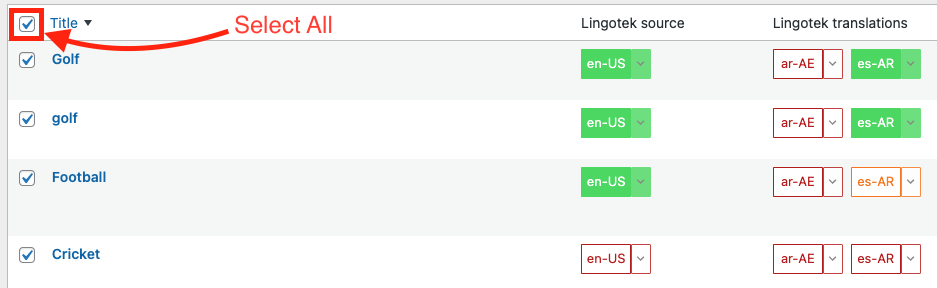
Under the Bulk Actions menu, scroll to select an action.

Click Apply.
The action will be applied to all selected documents.
Next: Configuring Settings
| Live Search | ||||||
|---|---|---|---|---|---|---|
|
On this page:
| Table of Contents |
|---|
Related pages:
Need Support?Visit the Lingotek Support Center.