Versions Compared
| Version | Old Version 3 | New Version Current |
|---|---|---|
| Changes made by | ||
| Saved on |
Key
- This line was added.
- This line was removed.
- Formatting was changed.
To start and complete the translation process:
Visit the Lingotek Support Center.
| Style |
|---|
#children-section {        display:none !important;    }
#comments-section {        display:none !important;    }
#likes-and-labels-container {        display:none !important;    }
.page-metadata {display:none;} |
Select the source(s) you would like to have translated.
- Simply
To upload a single document click on the source tile of the content you would like to translate
and it will immediately begin the uploading process.Select. You can also select the 'plus' icon.
To upload content in bulk, select some or all of your content using the boxes to the far left and you will notice that the selected content type in your Content Selector has become a drop-down. Select the drop-down and choose Upload.
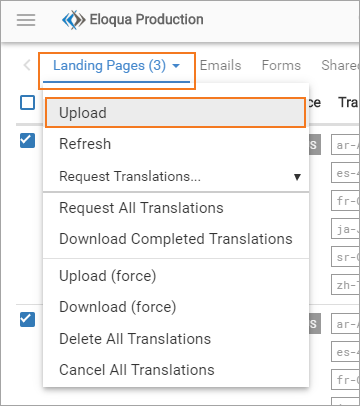 Image Removed
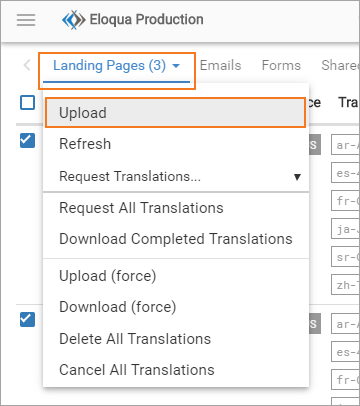 Image Added
A New Document modal will appear.
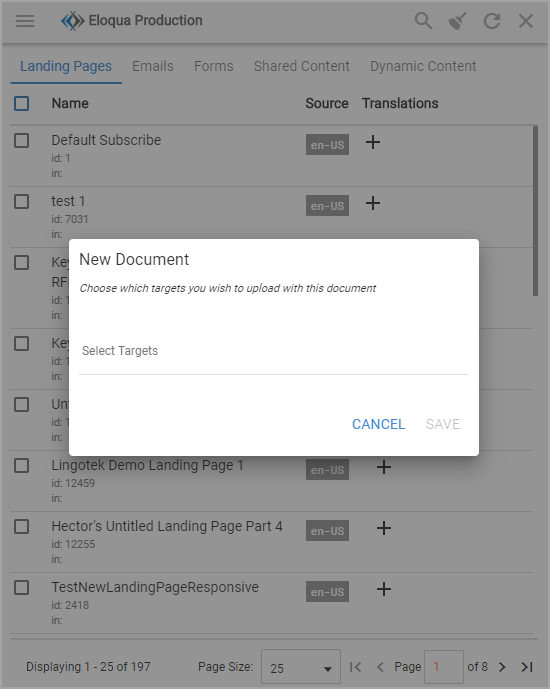 Image Added
Select the targets you want your content to be translated into.
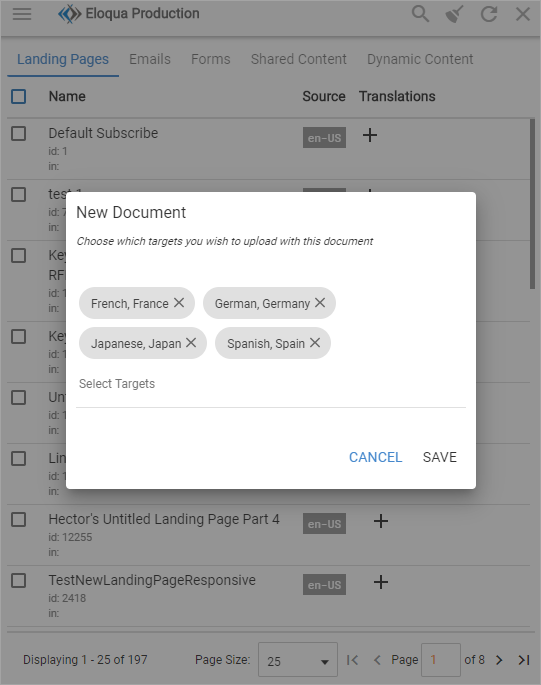 Image Added
If your settings are set to Set translation profile when uploading then you will also see a drop-down where you can select all available profiles.
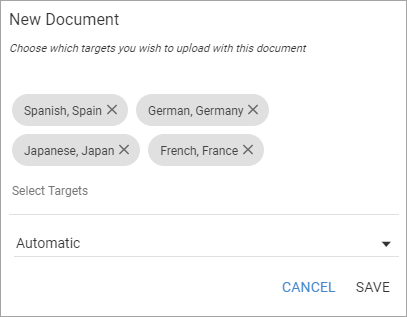 Image Added
You will notice that the
status of those documentsuploaded document(s) will change to
Importing.Importing and the selected translations will appear as new tiles in the Pending Status.
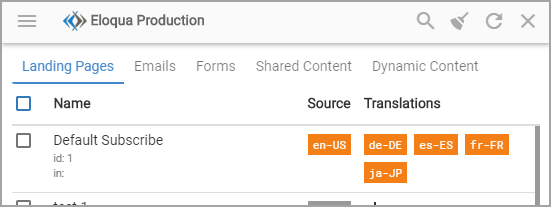 Image Added
- Simply
You can check on the progress of the document upload by selecting the documents you uploaded and then selecting refresh icon in the header. Alternatively, you can select the source tile and a drop-down will appear where you can select refresh.
- Do not request translations before the status of the document is Current. If you do this the target request will fail and cause complications. If you did request the target before the source completed uploading, you can fix this by deleting the translation and reuploading it after the source becomes current.
Once the Source status has changed to Current, you can start to request new translations.
Note 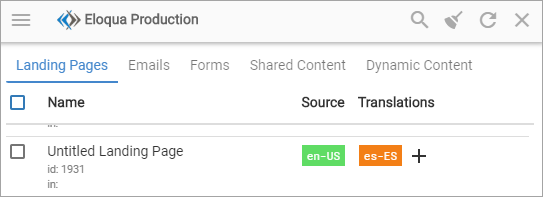 Image Added
 Request translations in three ways:
Select
the translation tile that represents the language code you want the source translated into. It will immediately start the translation process for that target.the plus icon in the content row that you want new translations for.
The Add Targets modal will appear.
You will be able to select any remaining targets set up in your profile.
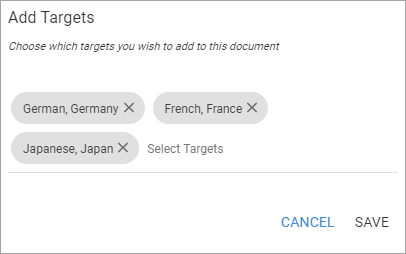 Image Added
To bulk request one target language across multiple sources:
Select the rows you want translated.
Open the Bulk Actions drop-down.
Select the Request Translations option.
This will open a drop-down where you can select one target language.
To bulk request all target languages across multiple sources.
Select the rows you want translated.
Open the Bulk Actions drop-down.
Select the Request All Translations option.
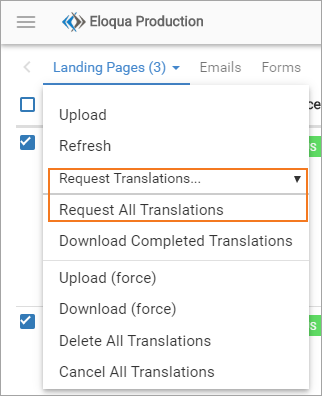 Image Removed
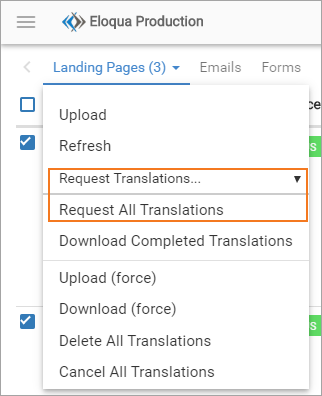 Image Added
Depending on your workflow and translation profile, the Translations will go through multiple statuses before they are ready to be downloaded/viewed.
If your Marketplace settings require you to manually download your content, you can do so when the status of the target becomes Ready.
Once your target is in the Current status you can click on the translation's tile and select the View option. This will allow open the translated content in a new page.
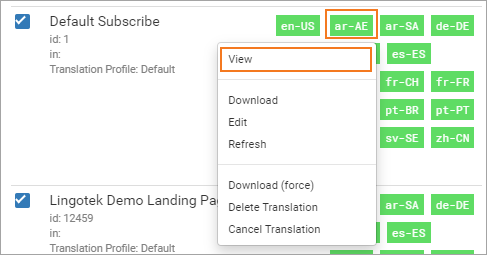 Image Modified
Tip You can also download your content when it is in the Ready Interim state. This state occurs when a Machine Translation process completes and the translation workflow has not yet completed. Users do this when they want to quickly release their machine-translated content while they wait for their completed content to finish.
| Live Search | ||||||
|---|---|---|---|---|---|---|
|
![]() Image Removed
Image Removed![]() Image Removed
Image Removed![]() Image Removed
Image Removed![]() Image Removed
Image Removed![]() Image Removed
Image Removed
Your third-party application will display the newly translated files with the language code in parenthesis at the end of the original file name. Do not edit the language code in the file name since it prevents translated files from displaying in the extension in the future.