Adding Information (one2edit)
After creating the new workflow, you will be able to add steps to the workflow content group. Add a language, any workflow actions, and a user to handle each step (explanation will follow).
Add a Language
When you add a language to a new workflow, it will tell one2edit which translation language to apply to the documents using workflow.
1) While on the Workflows tab, click to select and open the new workflow. (Tip: The workflow may already be open).
2) At the top of the page, choose Settings > Language Sets. Here, you will choose which language to use on the workflow.
- Open the folders and navigate to the language you want to use.
 Tip: You will only be able to select one language on each workflow.
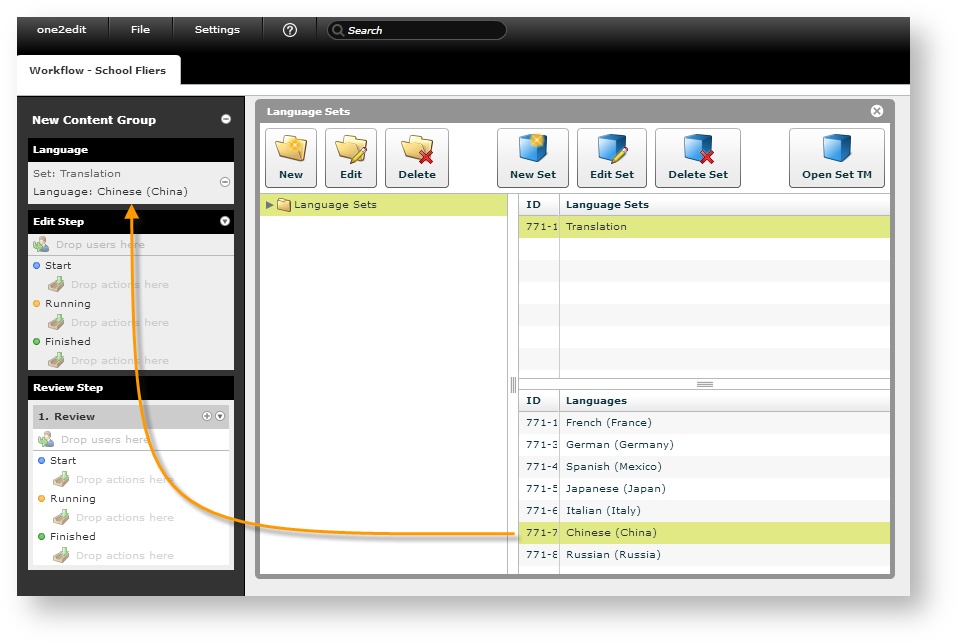
- Click to highlight the desired language.
Drag and drop it to the Language field on the left. - Close the dialog.
- Open the folders and navigate to the language you want to use.
Add Workflow Actions
Next, add a few workflow actions to the workflow. Actions tell the workflow what steps should be completed on the document and in which order. You can add Actions to the Edit Step, Review Step, and Steps to Completion.
To add workflow actions,
1) While on the Workflows tab, click to open the new workflow.
2) At the top of the page, go to File > Actions.
- Click to expand Advanced.
- Drag Trigger Webservice to the Edit step; drop it under the Start icon.
- Drag Trigger Webservice to the Steps Completion step (not a review or other step); drop it under the Finished icon.
- Close the dialog.
Once the workflow is set up, you will be ready to add users to each step.
Assign Users
Next, add a user to each workflow step. This user will receive notifications when the step is complete.
![]() Tip: You must at least one user to each step so the step will work.
Tip: You must at least one user to each step so the step will work.
1) Open the workflow.
2) Go to the top of the page and select Settings > Users and Groups.
3) Navigate to the user you want to assign.
4) Drag and drop to assign the user to the appropriate step.
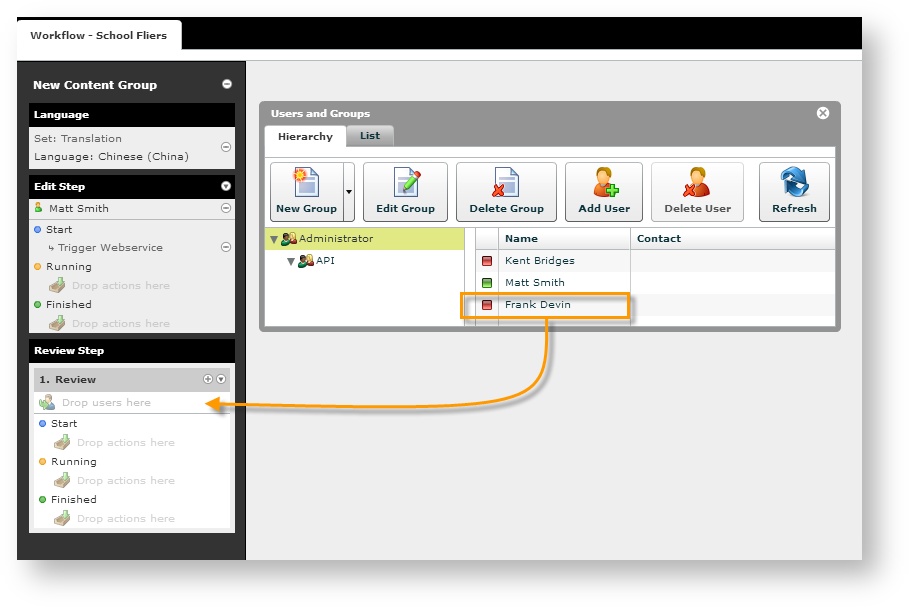
Be sure to place the user in the Drop Users Here box.
Now you are ready to configure each step.
Next: Configure Each Step
![]()
![]()
![]()
![]()
![]()
Next:
Configure Each Step
On this page:
Configure the Workflow
Need Support?
Visit the Lingotek Support Center.