Adding Community Members (Full PMs and Community Admins)To add new community members, Choose Community from the side bar and select Community Members. A dialog box will appear with three tabs: New User Existing User Bulk Import
New User With the New User tab the Community Admin can choose to send an invite or to simply add a user. To send an invite: 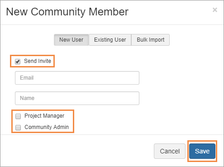 Image Removed Image Removed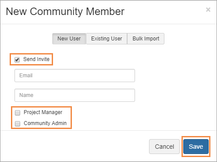 Image Added Image AddedSelect New Community Member. Check the box next to Send Invite. Enter the name and email of the user you wish to invite. Optionally give the Project Manager and/or Community Admin role to the user by checking the box(es). If boxes are left empty, the user will have the linguist role.
Select Save. The user will create their own user name and password.
If you do not wish to send an invitation: 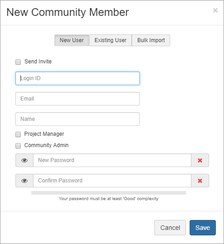 Image Removed Image Removed Image Added Image AddedSelect New Community Member. Do not check the box next to Send Invite. Provide the individual with a login ID. Enter their name and email. Optionally give the Project Manager and/or Community Admin role to the user by checking the box(es). If left empty, the user will have the linguist role.
Enter and confirm a password for the user. Select Save.
The user will be sent an email with their username and password. They will also be prompted to change their password the first time they login. Existing User An existing user is someone who belongs to the Community Admin's organization but does not belong to the community they are inviting them to. 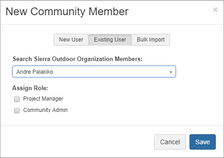 Image Removed Image Removed Image Added Image AddedSelect New Community Member. Switch to the Existing User tab. Type the name of the user in the search box and matches will appear. Select the correct user. Give the user a project manager and/or community admin role. If boxes are left blank, the user will have a linguist role.
Select Save.
Bulk Import  Image Removed Image Removed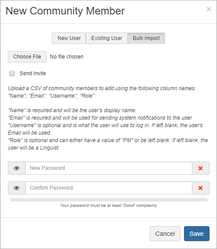 Image Added Image AddedSelect New Community Member. Switch to the Bulk Import tab. Select Choose File and upload a csv file with the following columns: Name, Email, Username, Role If Role is left blank, the user will be assigned the linguist role.
Choose to whether or not to send an invite. If you select Send Invite, the user will be sent an email with a link to set up their own password. You also have the option to send a personal message with the email. If you leave Send Invite blank, then you will assign a password to all users in the csv file. They will all be prompted to change their emails when they log in for the first time.
Select Save.
Vendor Project Managers can: Add, but not invite, users individually or in bulk who are from their organization. Only grant them the Vendor Project Manager role or Linguist role.
Existing User A vendor PM can only add users who are members of their default organization.  Image Removed Image Removed Image Added Image AddedSelect New Community Member. Switch to the Existing User tab. Type the name of the user in the search box and matches will appear. Select the correct user. Give the user a vendor project manager or linguist role. Select Save.
Bulk Import Select New Community Member. Switch to the Bulk Import tab. Select Choose File and upload a csv file with the following columns: Username, Role If Role is left blank, the user will be assigned the linguist role. To assign a user in the bulk upload a Vendor Project Manager role, enter the value "PM"
Select Save. The bulk import option does two things: It first looks at the Username listed in the Username column and checks if that Login ID can be associated with an existing user of the default community of the user who ran the bulk user import. If that user does exist, then that user is invited into the client's community instead of creating a new user. If there isn't a user associated with that Username, then a new user is created and they are either sent an invitation or given the password you set.
|