Changing from Test to Live Environment (Salesforce)
When an administrator first sets up the Enterprise connector, often it is connected to a beta environment for testing.
This allows administrators to fine-tune and adjust their settings in a non-live environment.
Once the beta phase is complete, the site administrator can connect to a live environment, in two basic steps:
- Delete all existing Enterprise Documents
- Change your Enterprise Settings to point to the new environment
Deleting All Enterprise Documents
First, you will want to delete all existing Enterprise Documents.
![]() Important! Do not leave any existing Enterprise Documents in the system.
Important! Do not leave any existing Enterprise Documents in the system.
![]() If you leave old documents in the system, they will try to point to the old environment – even though you are pointed to the new environment. When you create a translation document, it always points to the Enterprise environment it was originally created in.
If you leave old documents in the system, they will try to point to the old environment – even though you are pointed to the new environment. When you create a translation document, it always points to the Enterprise environment it was originally created in.
Tip: If they’ve been saved to translation memory, you won’t actually “lose” any completed translations.
Tip: If you don’t want to keep the translations created during beta testing, you can always delete the appropriate TM vault.
To delete all existing Enterprise Documents,
1) Log into your Salesforce account as a system administrator.
2) At the top of the screen, switch to Enterprise Documents tab. (If you don’t see this tab, click here).
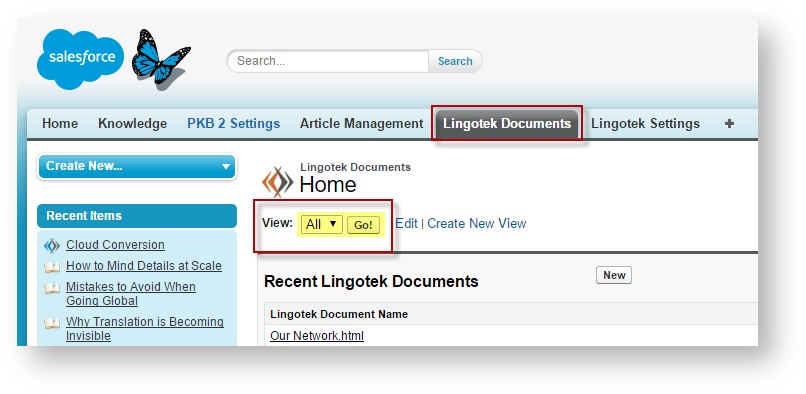
3) Next, display all documents. Go to the View menu, choose All, and click Go.
4) In the new screen, you’ll see a list of all Enterprise Documents within the system.
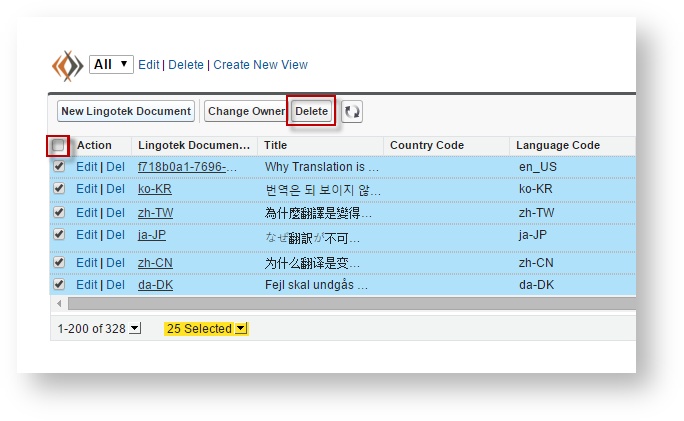
5) Next, select and delete all documents.
- To select all documents, click the check box above the list.
 Important! Be sure to select documents on other pages.
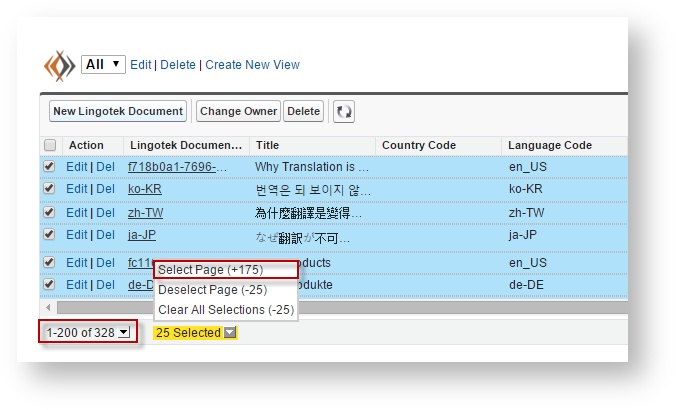
- Using the page view display options, select all documents.
- Click Delete (at the top of the page).
- Keep selecting and deleting the documents until all Enterprise Documents are gone.
- To select all documents, click the check box above the list.
6) All selected documents are removed from the system, and you are ready to switch to the new system.
Connecting to New Environment
Once all existing Enterprise Documents have been deleted, you will be ready to connect to the new account.
To connect to the new account, log in, go into Enterprise Settings, and set up the new environment.
1) Log into Salesforce as a system administrator.
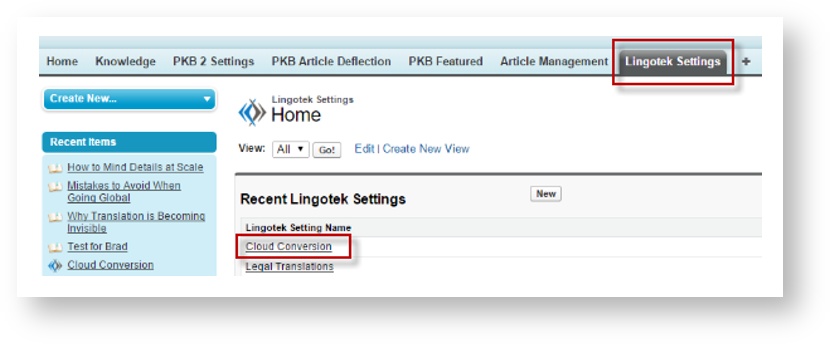
2) At the top of the page, switch to the Enterprise Settings tab. (If you don’t see this tab, click here).
3) On the Enterprise Settings tab, you’ll see a list of default settings. These settings manage which Enterprise projects and workflows you be used when completing Salesforce translations.
4) Click to open the Enterprise Setting you wish to edit.
5) Then, click Edit.
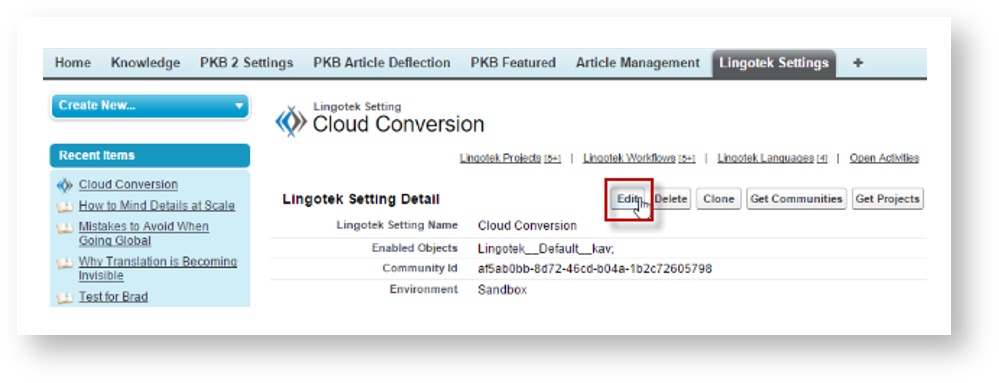
From the Edit screen, you will be able to choose the new Enterprise account, project, and workflow. This will let you choose which Enterprise resources to use when completing translations from your Salesforce integration.
6) Update the Environment, Default Project, and Default Workflow fields.
- Under Environment, scroll to select Production.

- Next, you’ll be asked to enter you API token.
Send an email to support@lingotek.com to get a copy of the API token.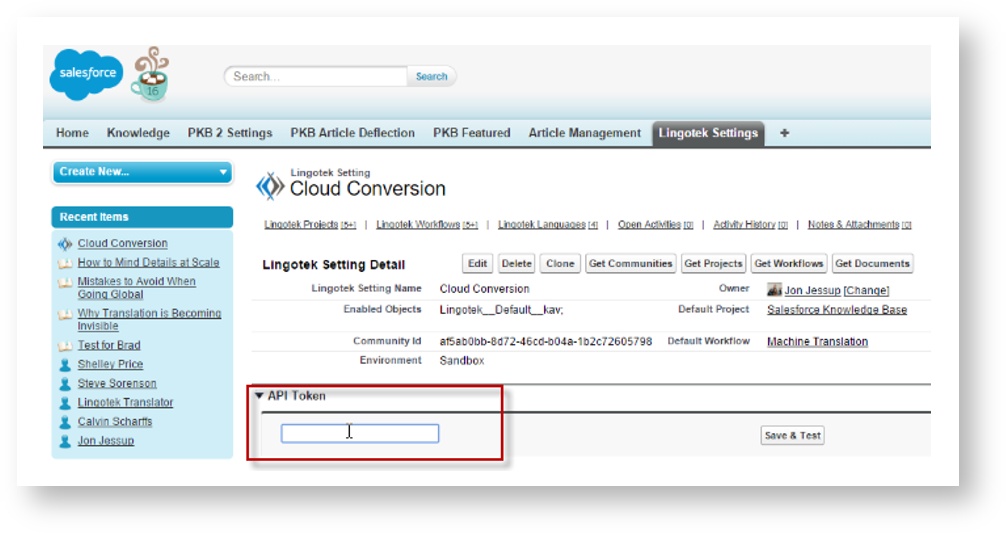
- Finally, choose the default project and workflow you wish to use for the Salesforce Connector.
 If you haven’t set up a project or workflow in the new environment, visit the documentation site for help.
- Next to Default Project, click the Search icon, and select the default project.
- Next to Default Workflow, click the Search icon. Select the Workflow you want to use.
- Under Environment, scroll to select Production.
Now you have successfully pointed your Salesforce translations to your live Enterprise environment, and all translation requests will be handled as specified in your Enterprise settings.
If you have any questions, please send an email to support@lingotek.com or visit our documentation site at www.documentation.lingotek.com.
![]()
![]()
![]()
![]()
![]()
On this page: