Once you’ve created a Translation Integration Framework and Cloud Config, you’ll be ready to apply them to a site. These configurations control the translation settings, and will be applied to any translation projects created on the site.
To add a Translation Integration Framework and Cloud Config to a site,
- Log into AEM as an administrator.
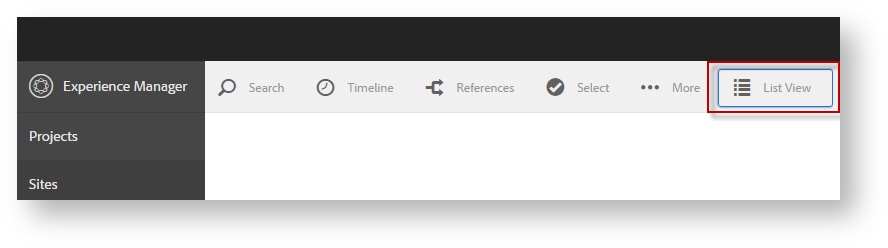
- Go to the side rail and select Sites.
- Switch to List View. (Click the current view (upper right) until List View appears).
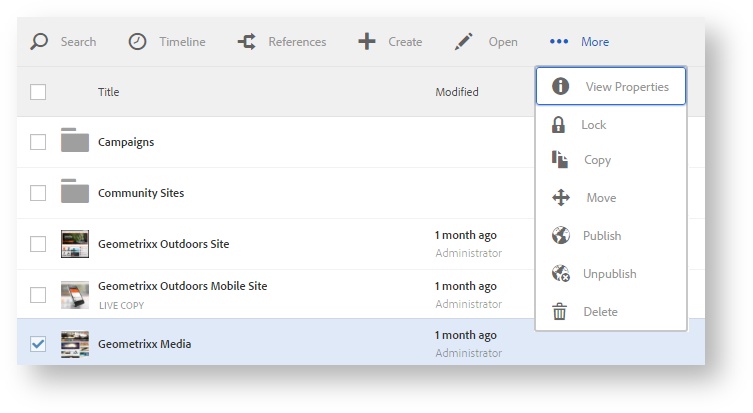
- Next, check the box next to the site you wish to manage.
- With the site selected, click View Properties (upper right).
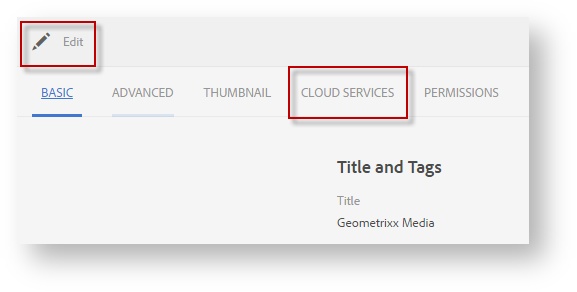
- Then, choose Edit and switch to Cloud Services.
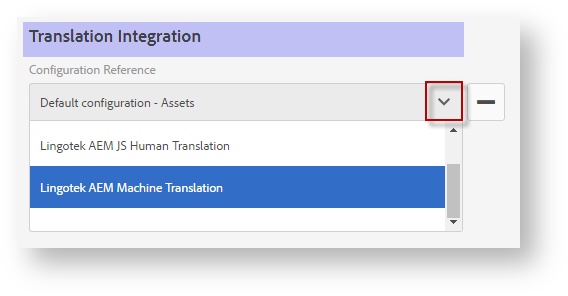
- Add the Translation Integration. Under Cloud Service Configurations, click the + sign, and scroll to select “Translation Integration.”
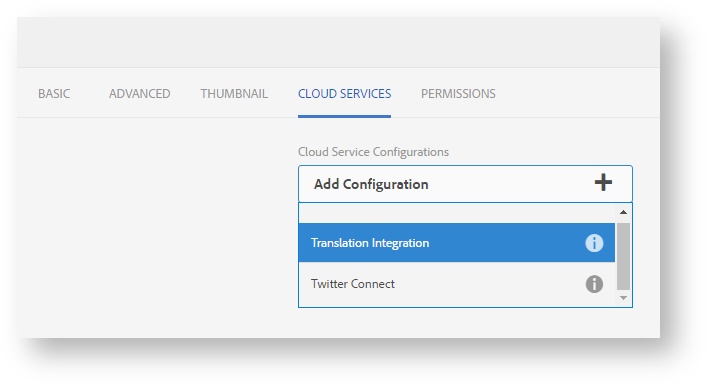
- From the new Translation Integration drop down, scroll to select the Translation Integration created previously.
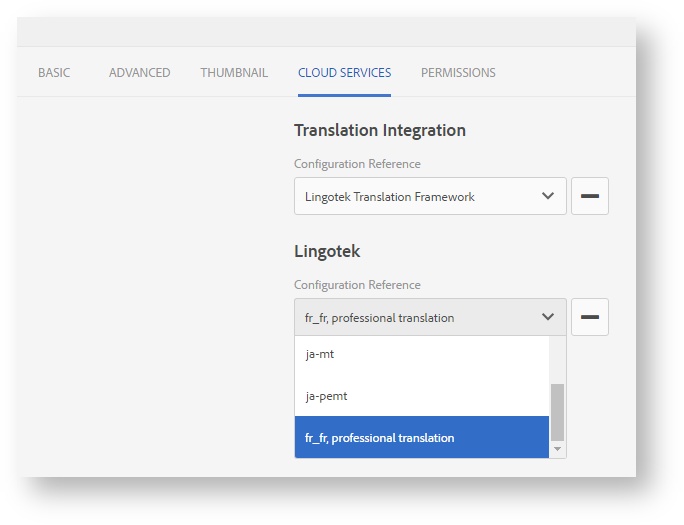
- Add the Cloud Config. Under Cloud Service Configurations, Click the + sign, and scroll to select “Lingotek.”
- In the drop down, scroll to select the Cloud Config associated with the Lingotek project you wish to use on this site.
- In the drop down, scroll to select the Cloud Config associated with the Lingotek project you wish to use on this site.
- To save your work, click Done (upper right).
Your translation settings are finished, and you are ready to create site copies and start translating.
Next: Create Copies, Projects
| Live Search | ||||||
|---|---|---|---|---|---|---|
|
![]()
![]()
![]()
![]()
![]()
Next: Create Copies, Projects
Need Support?
Visit the Lingotek Support Center.