Overview
A rate chart in the Translation Management System (TMS) contains the details of the prices that vendors or also referred to as language service providers (LSPs) charge their clients for services rendered. Services involve different various workflow phases of the translation process, including machine translation, human translation, review, desktop publishing, and other phases.
This page provides instructions for vendors or LSPs to set up and manage rate charts in the TMS.
Create a rate chart
With a rate chart, vendors can specify their pricing for standard translations, domaincontent-type specific translations, specific source/target combinations, and more.
To create a rate chart, follow these steps:
Sign in to your Lingotek TMS account as a vendor, and then click VENDOR from the main menu bar.
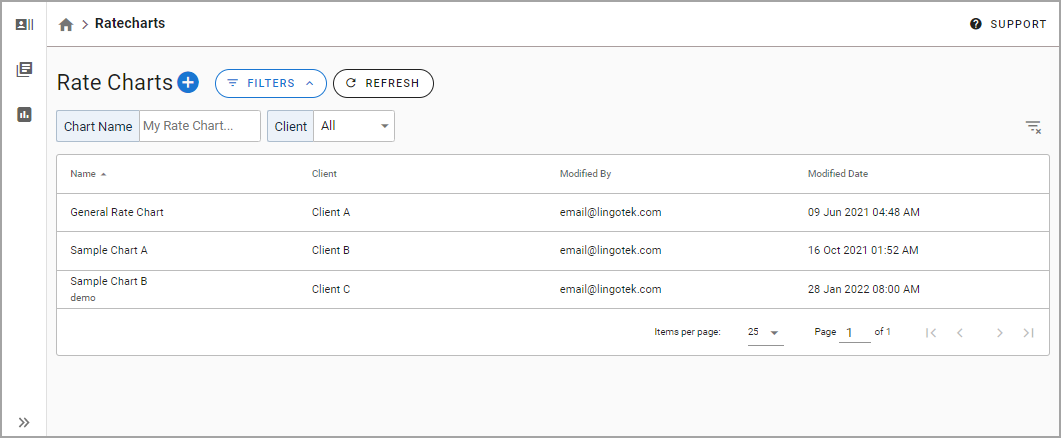
In the left panesidebar, click the Rate Charts option.
On the Rate Charts page, click the Create symbol beside Rate Chart.
 When the New Rate Chart page appears, provide all the necessary information in each step to create a new rate chart.
Add details to a rate chart
To complete the rate chart, provide the necessary information for the following stagessteps:
General Info
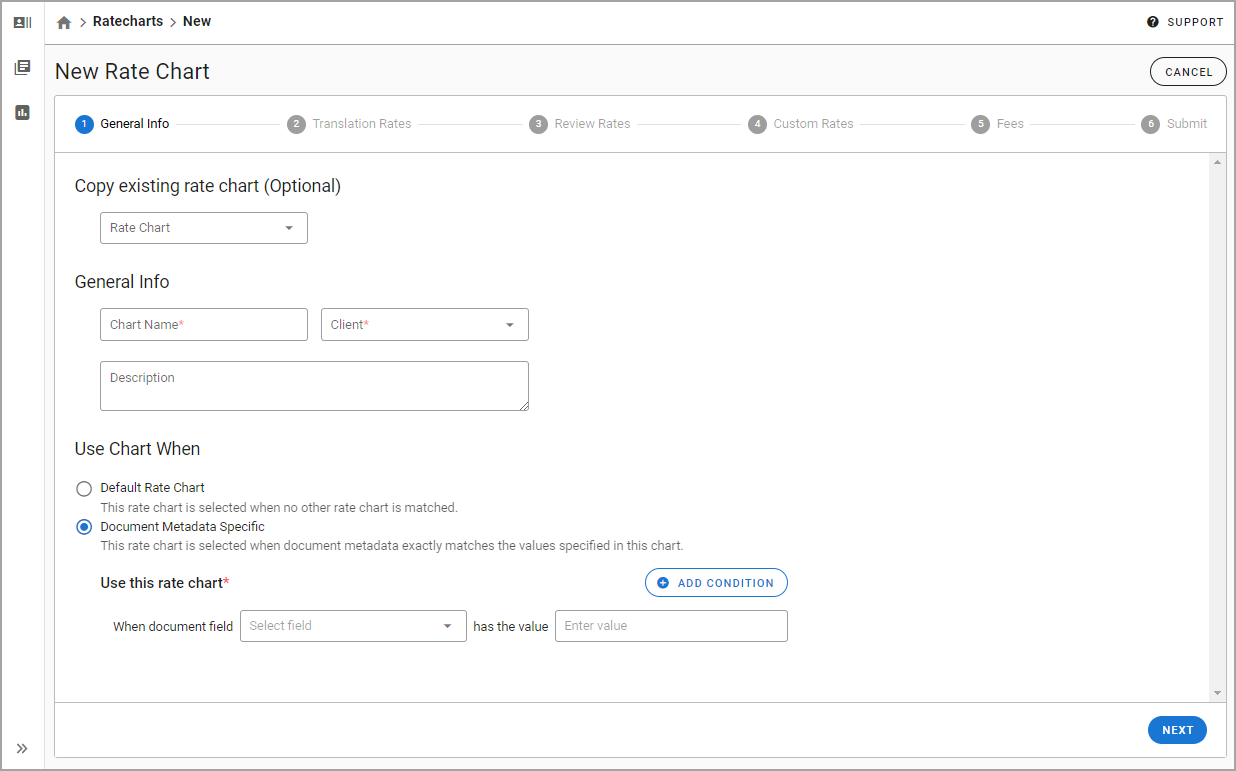
In the General Info stage step, enter the following information:
Copy existing rate chart (Optional) - In this section, select the rate chart whose information such as metadata combination, language pairs, and pricing information you want to copy. This step is optional.
General Info - In this section, enter the following information:
Chart Name - Enter the applicable chart name.
Client - Select the client you want to make the chart for.
Description - Enter the rate chart’s description.
Use Chart When - In this section, select when or in what situations the rate chart is used.
Default Rate Chart - Select this option to create a general rate chart. Only one general rate chart can be created for a client.
A general rate chart is used for projects or documents with no set metadata or if no other rate chart matches its metadata configuration. General rate charts are also used if there are no other rate charts available.Document Metadata Specific - Select this option to create a rate chart with specific metadata configurations. This type of rate chart is used for documents and projects that match the configuration. This enables LSPs or vendors to have different rates for different content types.
When you select the Document Metadata Specific option, the following boxes will appear:When document field - From this list, select the applicable metadata field.
Has the value - Enter the applicable metadata value.
This option is useful for documents with detailed metadata information. For example, you can select the Business unit option for the When document field box and then set Marketing for the Has the value box. This way, documents or assets that have Marketing for their business unit will automatically use the rate chart that matches this metadata configuration.
After completing this stage, click Next.
Click ADD CONDITION to add a new row of metadata combination, and click the trash bin symbol to delete a metadata combination.
The metadata combinations that you set up are not case-sensitive.
Translation Rates
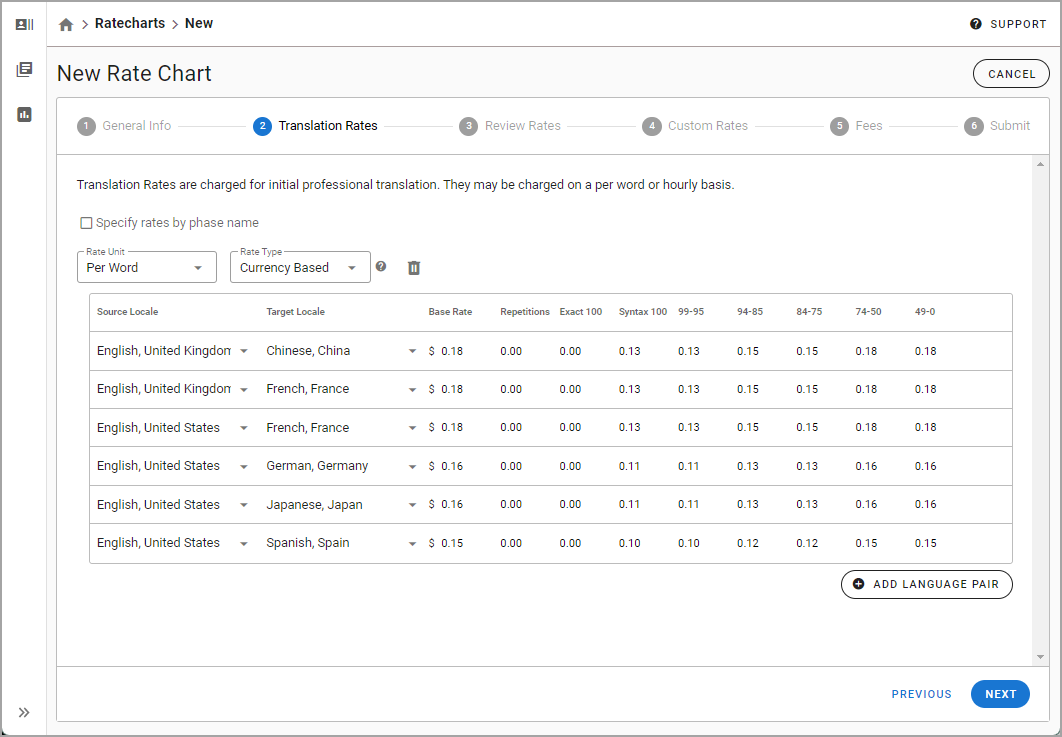
In the Translation Rates stage step, you can set up the price for the initial professional translation you offer your client. This is charged either per word or per hour. You can also choose to set up translation rates based on phase names.

Setting up basic translation rates
To set up translation rates, follow these stepsyou must:
Enter the following information:
Rate Unit- From the Rate Unit list, select either of the following:
Per Word - Select Per Word to charge the service per word.
This option is ideal for human translation or review tasks.Per Hour - Select Per Hour to charge the service per hour.
This option is ideal for time-consuming tasks such as transcreation, desktop publishing, or layout designing.
When you select this option, the Rate Type list is greyed out. If you select Per Hour from the Rate Unit list, the fuzzy match columns are unavailable.
Rate Type - From the Rate Type list, select either of the following:
Currency Based - Select Currency Based to set the price chart’s amount in currency form.
Percent Based - Select Percent Based to set percentages of the base rate for each TM match strength individually.
The system automatically processes the figure you enter in the price chart to show either currency and percentage when you toggle between both options.
In the Price Chart, enter the following information when your Rate Unit is per word:
Source Locale - Select the source locale or language.
Target Locale - Select the target locale or language.
Base Rate - Enter the standard rate or amount that you want to charge the client for each translated word.
Repetitions - Enter the amount or percentage for repeated segments.
Exact 100 - Enter the amount or percentage for translations that have a 100% match Translation Memory (TM) match.
Syntax 100 - Enter the amount or percentage for translations that have a 100% syntax match.
Fuzzy matches - Enter the amount or percentage of the base rate for each fuzzy match type.
In the Price Chart, enter the following information if your Rate Unit is Per Hour:
Source Locale - Select the source locale or language.
Target Locale - Select the target locale of language.
Quote (words per hour) - Estimate your hourly cost based on the source word count. This cost will be replaced when billable hours are collected.
Hourly rate - Enter the chargeable amount for every hour rendered for service.

After you complete this stagestep, click NEXT.
Setting up translation rates based on phase names
To set up translation rates based on phase names, follow these stepsyou must:
Select the Specify rates by phase names check box.
When the Phase Name box appears, enter the applicable phase name whose rate you want to specify.
Make sure to enter the correct spelling of the phase name.Repeat steps 1 to 3 from the Setting up basic translation rates section.
Review Rates
In the Review Rates stage step, you can specify the amount you want to charge for review phases in your workflow. This stage step features the same options as the Translation Rate stage.
Custom Rates
The Custom Rates stage step has the same features as that of Translation Rates and Review Rates. This stagestep, however, is dedicated to rates for customized phases in your workflow.
In this stage, the price chart defaults to an hourly rate, and you must specify the rates according to the phase name.
Aside from the steps above, keep note of the following options available for the Translation Rates, Review Rates, and the Custom Rates stages:
COPY TRANSLATION LANGUAGES -Click this option to copy the translation languages to another row.
ADD LANGUAGE PAIR - Click this option to add a new language pair.
Copy value to all rows - Click this option to copy the amount or price from a specific field to an entire row.
Copy row - Click this option to copy the values of an entire row.
Delete row - Click this option to delete an entire row or language pair.
Fees
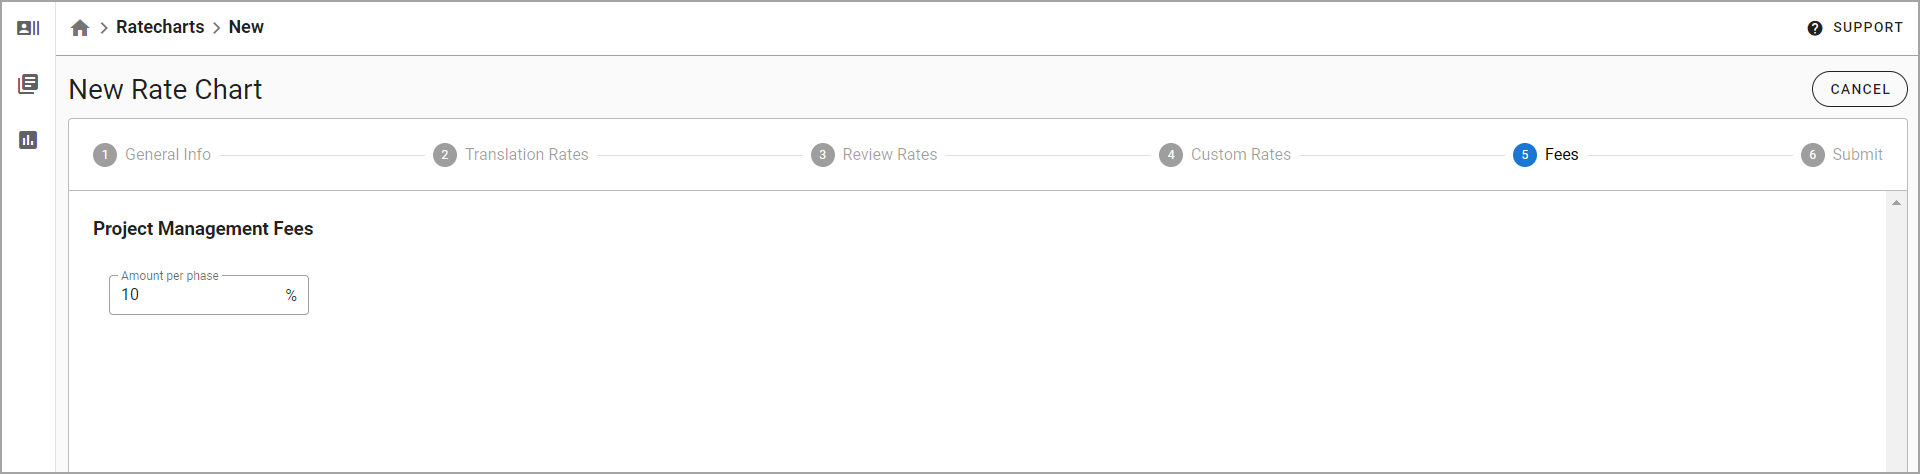
In the Fees stagestep, enter the project management fee in percentage form in the Project Management Fees box. After that, click NEXT to proceed.
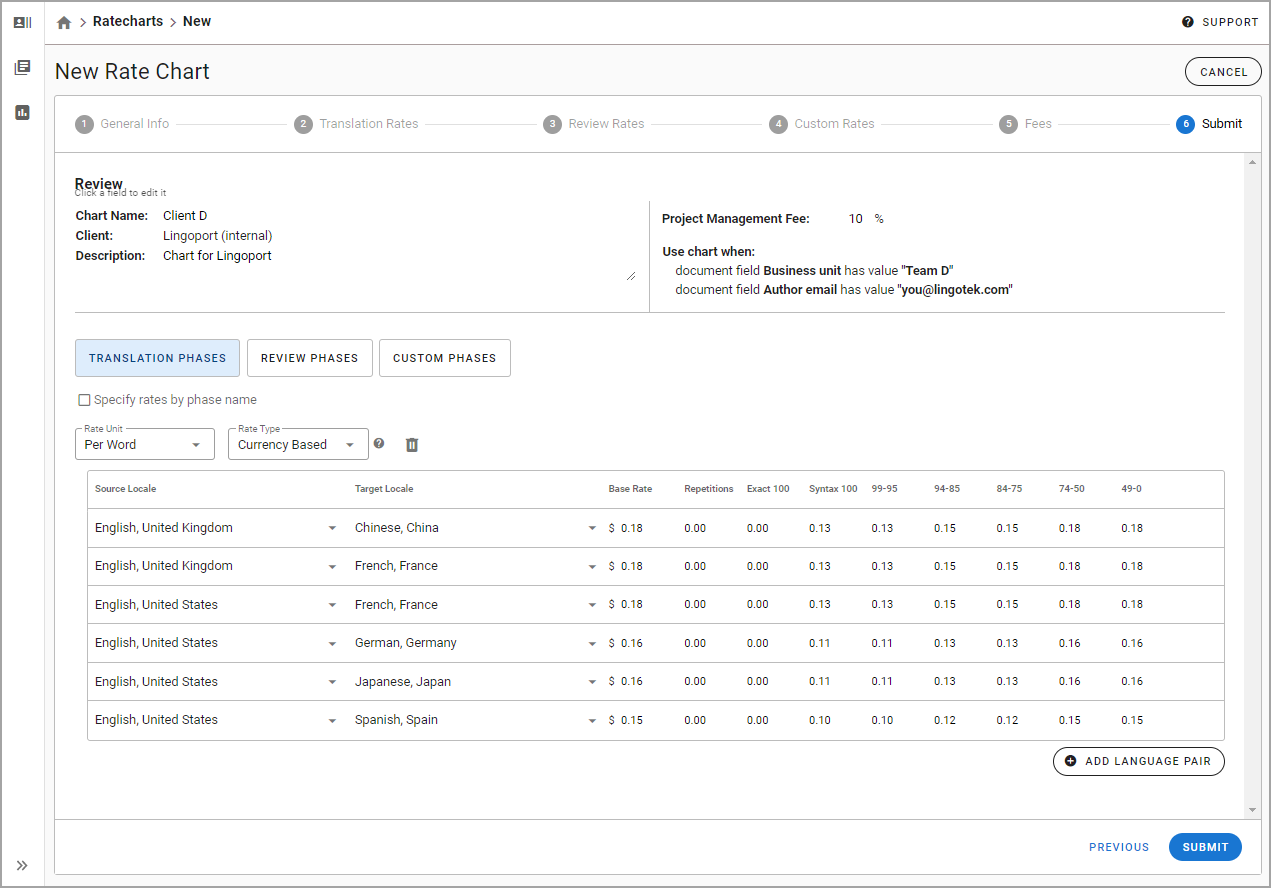
Submit
In the Submit stage step, you can review all the information about the chart. You can also directly edit the title of the chart, its description, as well as other details. After you review the chart, click SUBMIT to save the new chart and to complete the process.
| Info |
|---|
You can also go back to different stages steps even after you click the NEXT option, as long as you haven’t clicked SUBMIT yet. |
Managing a rate chart
As a vendor organizations organization or LSP, you can edit or delete a rate chart in on the summary page. However, only users who are assigned to manage an organization’s rate charts are allowed to do this.
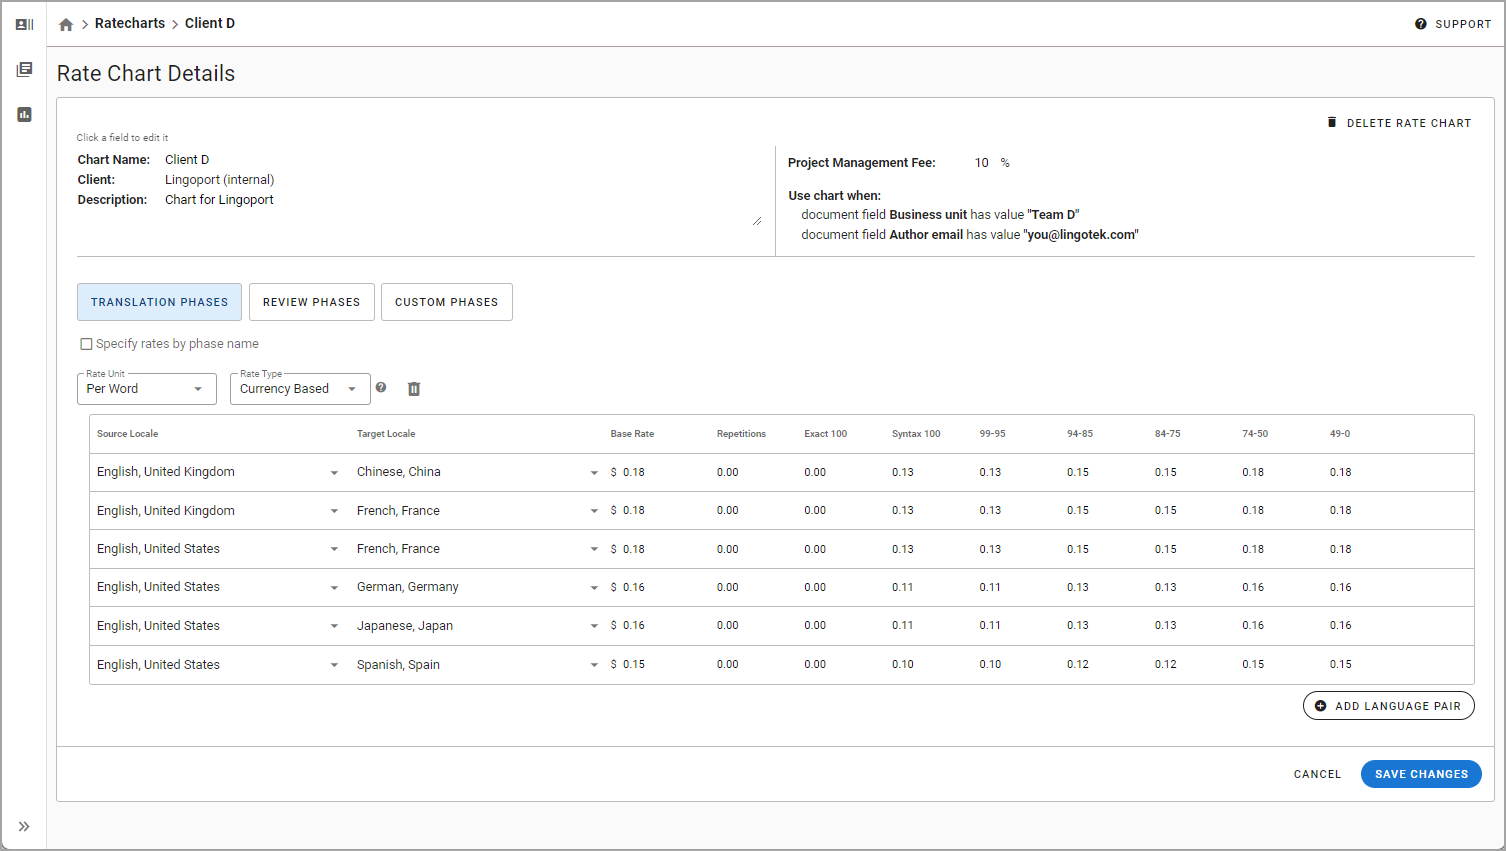
Editing a rate chart
To edit a rate chart, follow these steps:
Click Rate Charts in the left panesidebar.
When the Rate Charts page opens, select the rate chart you want to edit.
On the summary page of the selected rate chart, click a field that you want to edit, and enter your desired changes.
Click SAVE CHANGES to save all changes that you added.
Deleting a chart
To delete a rate chart, follow these steps:
In On the Rate Charts page, select the rate chart you want to delete.
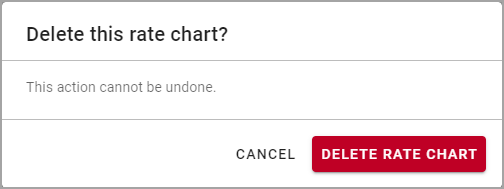
On the summary page of the selected rate chart, click DELETE RATE CHART in the upper-right pane.
When the confirmation message appears, click DELETE RATE CHART to finalize the deletion process.
This page is for:
| Status | ||
|---|---|---|
|
| Status | ||||
|---|---|---|---|---|
|
On this page:
| Table of Contents | ||||
|---|---|---|---|---|
|
Need Support?
Visit the Lingotek Support Center.