Rate charts spell out pricing for standard translations, domain-specific translations, specific source/target combinations, and more.
- Log into the Vendor Management App as a vendor.
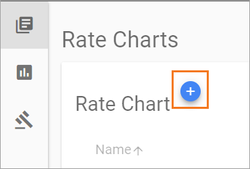
- From the left menu, select the Rate Charts icon.
- At the upper right, click the + sign.
Choose to create a brand new rate chart or to create one from an existing rate chart.
Info Copies of existing rate charts will copy over the chosen metadata fields but not their values in the Usage step (see below).
A new window will appear, complete each of the five steps to create a new rate chart.
Tip If you chose to create a chart from an existing chart, most of the information will already be filled out, make edits as necessary.
Steps to create a Rate Chart
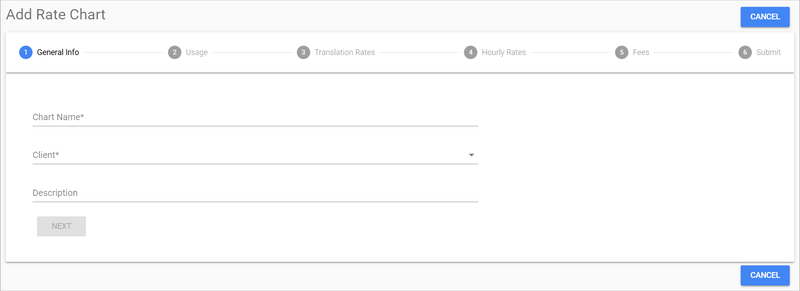
Step 1: General Info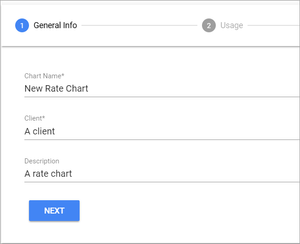
Provide a Chart Name. Required.
Tip You cannot have two rate charts with the same name for the same client.
- Choose which client the chart will be tied to. Required.
- Give the rate chart a description to distinguish it from other rate charts. Optional.
- Once all the required fields are completed you can proceed to step two.
Step 2: Usage
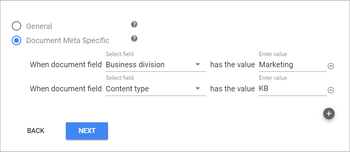
A General rate chart will be used if no other rate chart with matching metadata can be found or if it is the only rate chart.
Info You can have one General Rate Chart per client.
Document Meta Specific rate charts will be used for documents that have matching metadata. This enables you to have different rates for different content types. Matching against document metadata is NOT case sensitive.
Step 3: Translation Rates
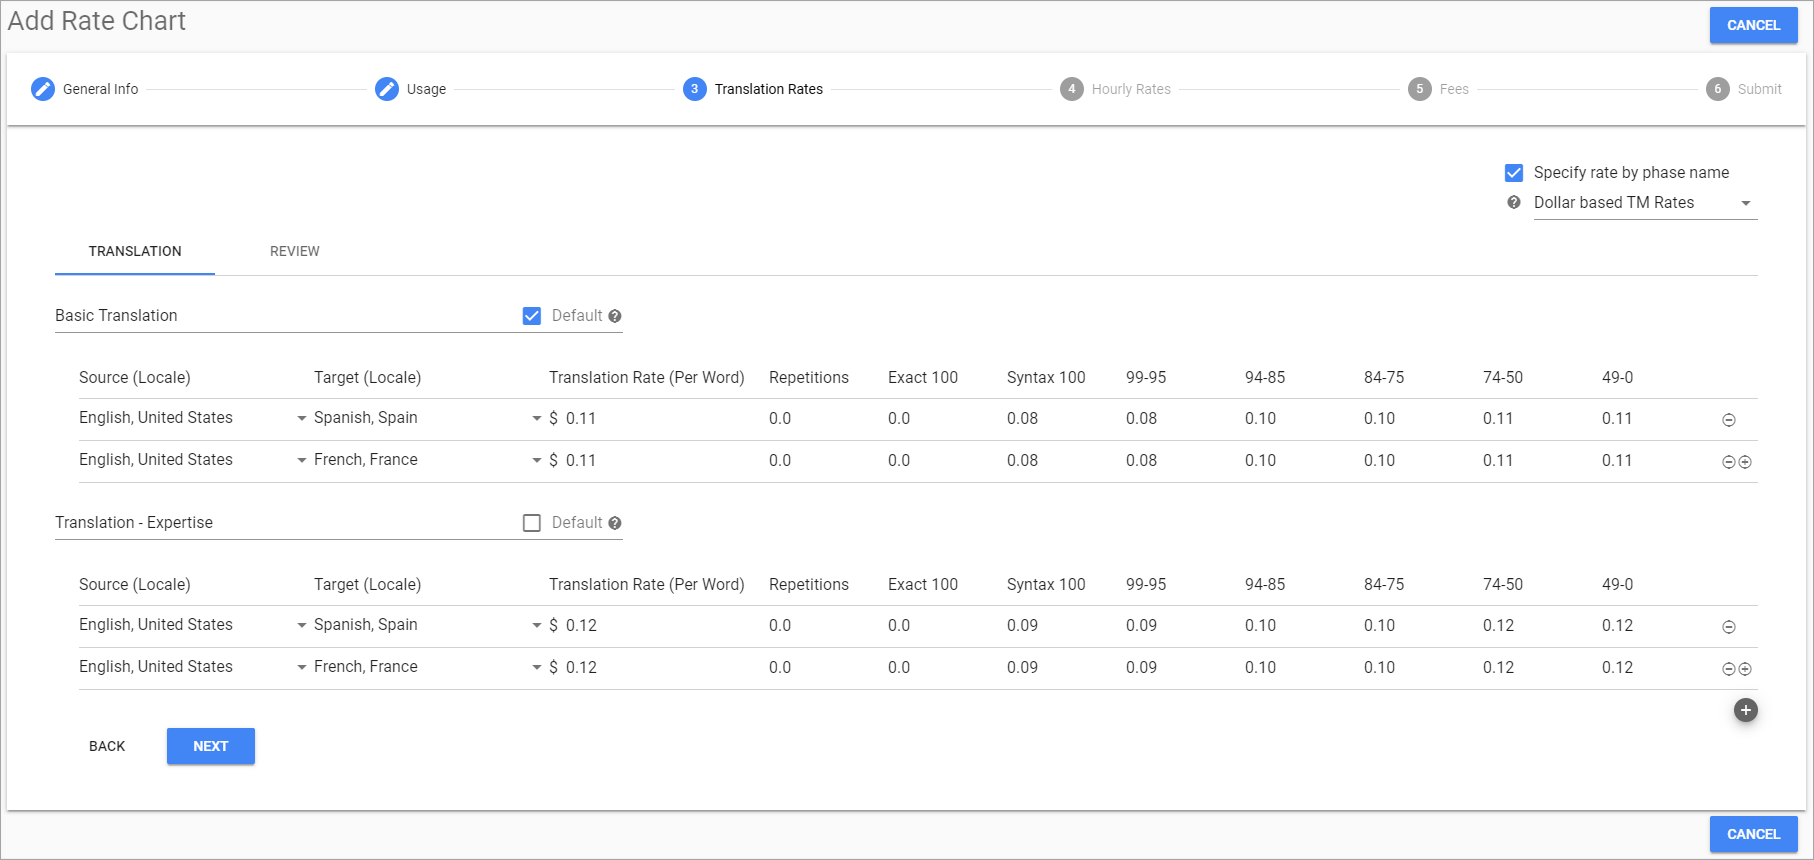
- This step is optional.
- Choose if there should be one general rate for translation/review type phases or if translation type phases and review type phases should have different rates depending on the phase name.
- Select Specify rate by phase name to give you the option to create multiple sets of rates for each phase name. Note that it must also match the phase-type as well.
- Selecting this option means that you will need to create a default rate, in the case a phase is matched to this rate chart but cannot find a matching phase name.
- Give each set of language pairs a Rate Name. This should match the name of the phase you want to have those associated costs. Matching the phase name to the rate name is not case sensitive.
- To create another set of rates for a different phase name, select the large + icon below the table of language pairs. This will copy all the language pairs from the default set of rates, but it will not copy over the actual rates.
Choose whether to apply translation rates as percentages of the Base Rate or as dollar amounts.
Info The default setting is dollar amounts. As you toggle between dollar amounts and percentages, the system will provide the calculations to keep the rates the same for dollar amounts and percentages.
- Add language pairs.
- If you do not need rates for specific locales, use the Any Locale option (English, Any Locale).
- Use the small + icon on the last row of language pairs to add more language pairs.
- Provide the Per Word Rate. This is the full rate that will be used to calculate Translation Memory Rates. Provide the rate in dollars.
Translation Memory Rates. Enter the rate that should be applied for words that fall under different Translation Memory matches.
Tip If you have a column of rates that are all the same rate, you can choose to copy that rate down the column from a specific cell. If you have groups of language pairs that have the same rate, it is recommended you add those in that order so you can use the feature multiple times.
Select the Review tab to do the above for Review type phases.
Tip You can have completely different sets of language pairs under the Review tab. However, if the language pairs you need to set up are generally the same as in the translations tab, then select the copy icon above the add/remove column of the rate chart.
Step 4: Hourly Rates
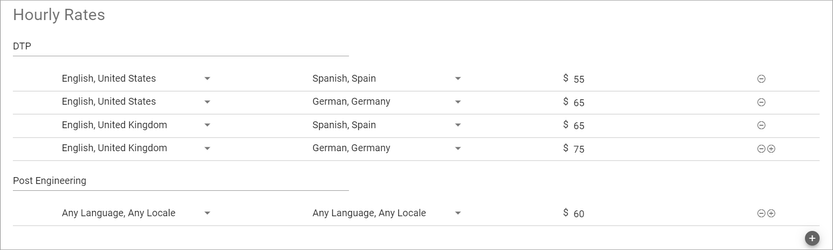
Choose the + icon to add a new hourly rate.
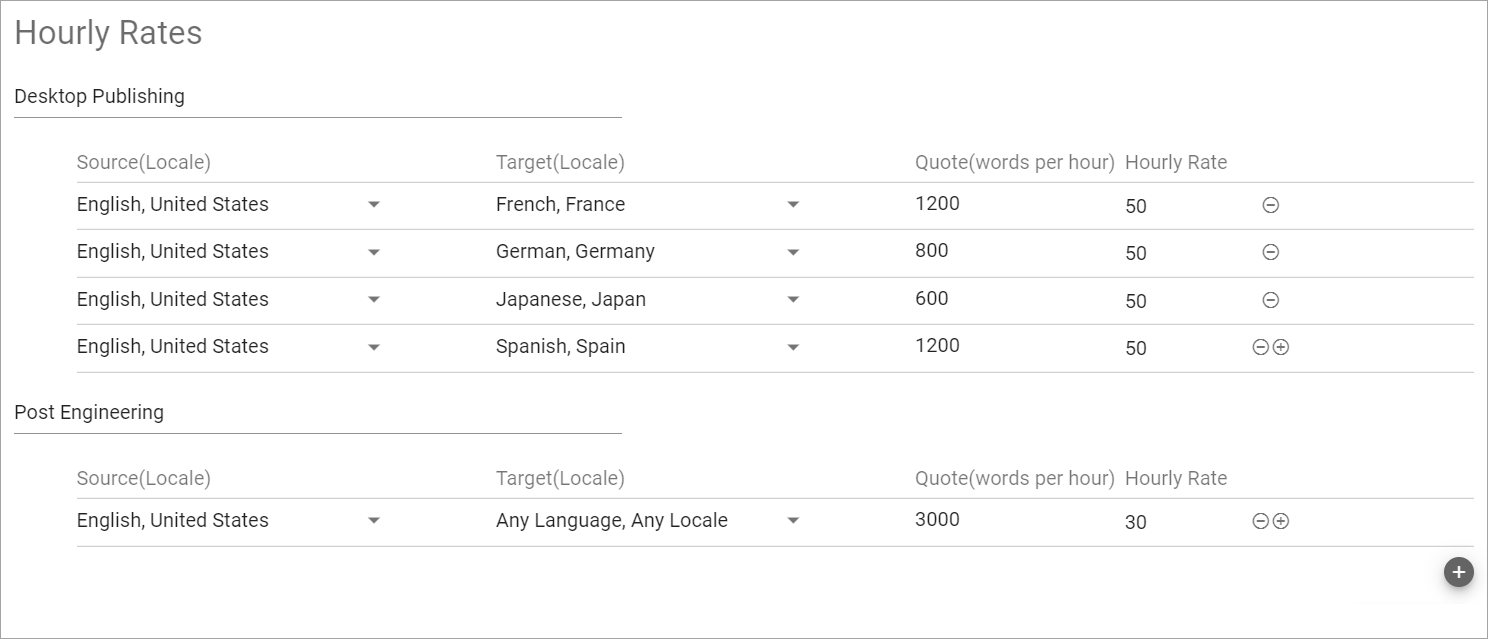
Hourly Rates. To calculate costs for Custom Phases in your Workflow, use Hourly Rates.
The name of your Hourly Rate must match the Phase name in the workflow in order for the Rate chart to calculate the costs. Matching is not case sensitive.
- Choose the + icon to add a new hourly rate.
Just like in Translation and Review rates, you may create different rates per language pair for the same Hourly Rate. Simply add Add as many language pairs as desired.
Tip If you only want one rate for all language pairs, simply choose Any Language, Any Locale for both the source and target language.
Also, note that each time you add a language pair the Source Language and the Rate carry over to the next row. This makes it simple to make minimal changes if several language pairs will be charged the same rate.
Use the source word count auto calculate quotes for hourly work. This quote is not binding and will be replaced by the billable hours added by the linguist or project manager when the phase is completed. Both the quoted hours and billable hours are displayed in Cost and Invoice reports.
Tip Over time you can provide more accurate quotes by comparing the quoted hours and billable hours in the invoice report.
- Set the cost per hour in the Hourly Rate column.
Step 5: Fees

- Fees. Currently, rate charts support Project Management fees. It is a percentage of the total cost of all billable phases in the workflow that will be added to the Total Cost of the target.
- All the fields in this step are fixed except for the amount. Simply add a number in the Amount field. Note that this is calculated as a percentage.
Step 6: Submit

- Look over your work and confirm that it is correct. If everything looks accurate, choose Submit.
- If you need to go back and make changes, use the back button or select the step in the header that needs to be changed.
Alternatively, you may Cancel the whole rate chart. This cannot be undone.
Info title Things to look for - Any of the rate steps that were skipped (no rates were added) will say None Found. If you did not mean to skip those steps, you may go back and make adjustments.
- If you skipped all the steps with costs you will receive a warning at the bottom of the confirmation step. These "blank" rate charts will not be used even if there are targets that match the criteria to use them.
- If you look over the confirmation step and it seems you have fewer rates filled out than you thought, it is likely that you may have forgotten to fill out essential information. Go back to the step where you think the mistake was and you will find the partially filled out rates still ready to be fixed. Return to the confirmation step after making the edits and you will see all your rates.
| Live Search | ||||||
|---|---|---|---|---|---|---|
|
![]()
![]()
![]()
![]()
![]()
Need Support?
Visit the Lingotek Support Center.