Versions Compared
| Version | Old Version 30 | New Version Current |
|---|---|---|
| Changes made by | ||
| Saved on |
Key
- This line was added.
- This line was removed.
- Formatting was changed.
Overview
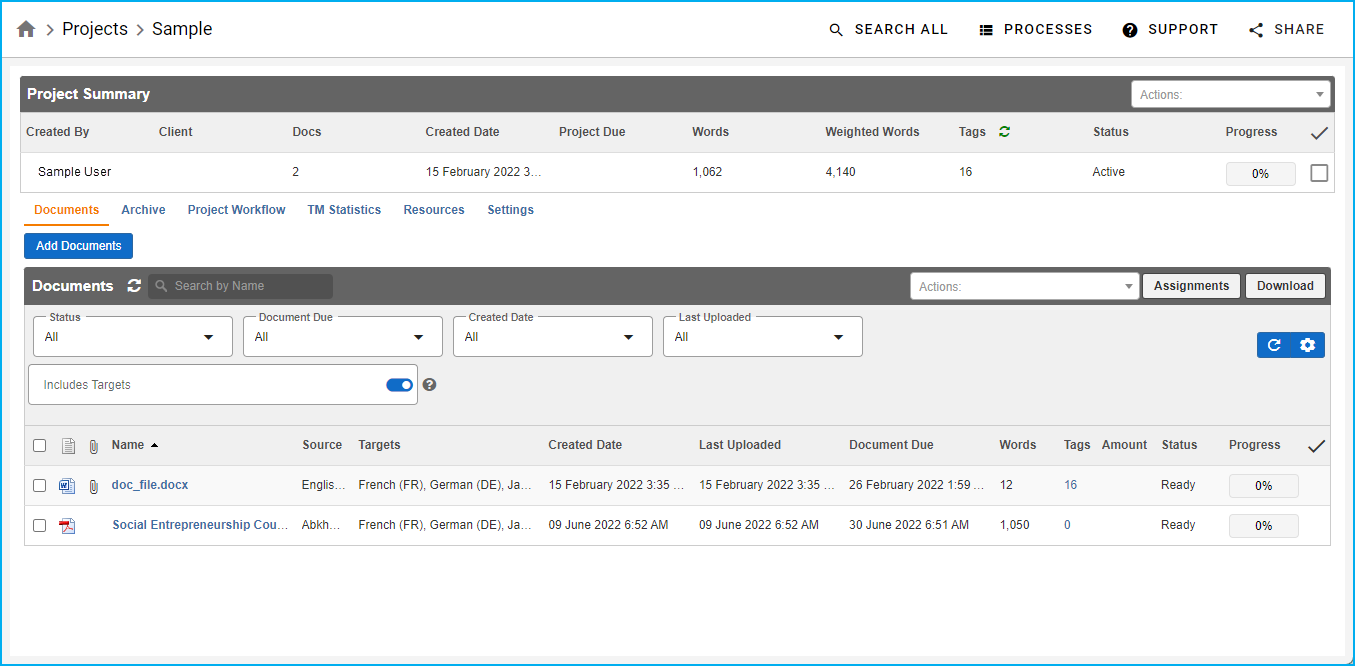
In the Document tab of the Project app, you can add documents to a project, as well as set up its target locales, add a due date, and perform other document-related tasks.
To access the Document tab, click Project on the main menu bar, and when the Projects page opens, click a project. Once the project details page appears, click the Document tab, which you can find below the Project Summary section.
Source and Target Languages
From the Project Workflow tab, you can select your default source and your target languages. These are used to configure:
Vendor assignments
Linguist assignments
Due date configurations
The default source and target languages automatically populate on the Add Documents page.
The first source language will be used as the default on the Add Documents page.
Visit the Uploading Documents page to know more about adding and uploading documents.
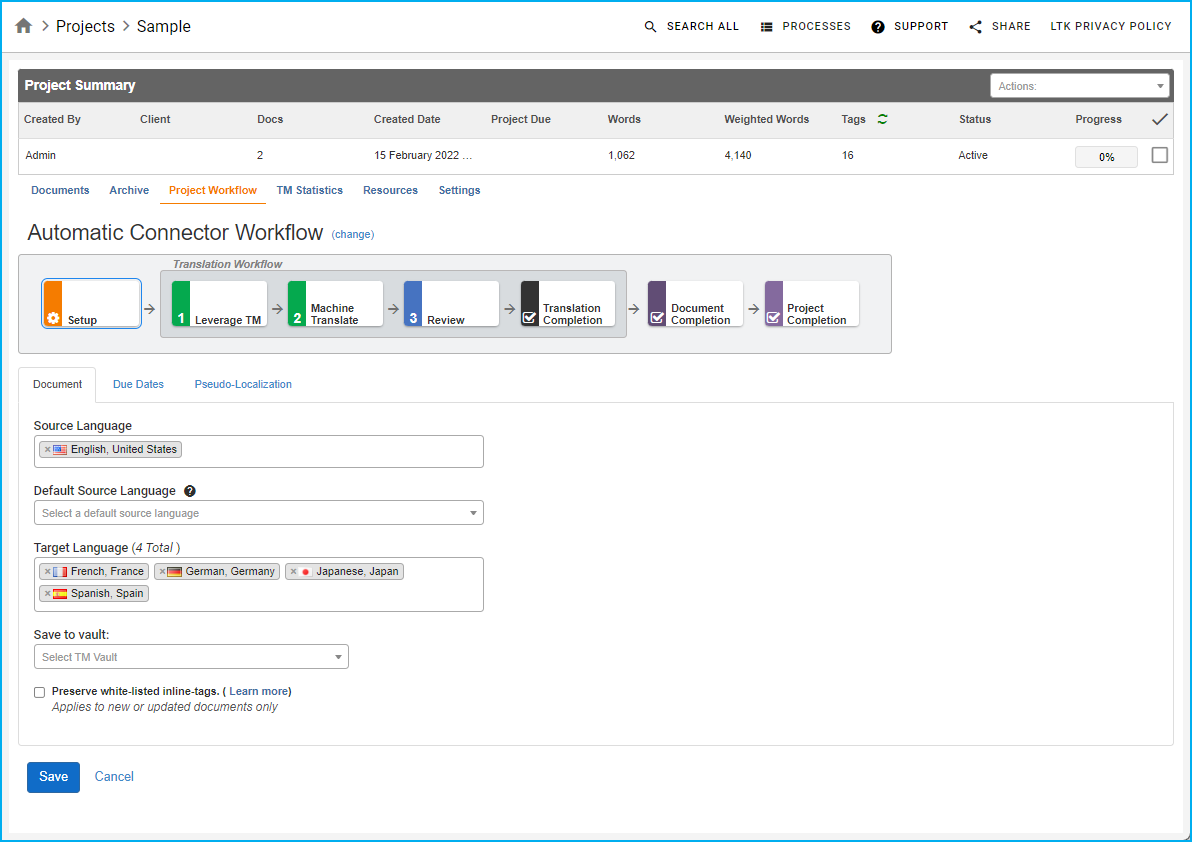 Image Removed
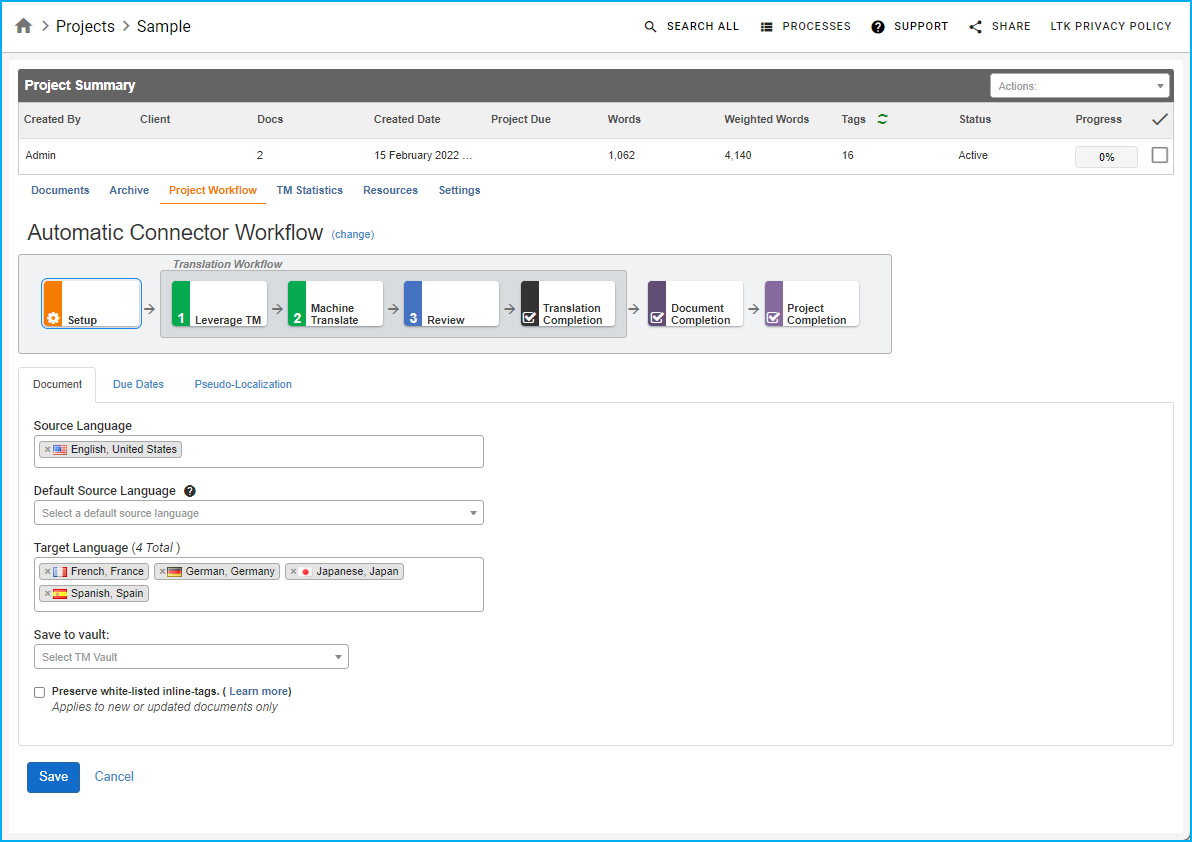 Image Added
Save-To Vault
The Save-To Vault is where all of the TM generated from the translation process will be saved.
| Note |
|---|
Be sure to select a vault from the Save-To Vault list. If no vault is selected, you are required to select a vault everytime a document is uploaded to the project. |
To make new TM available to linguists as soon as it is created, you will want to list the Save-To Vault you have selected in the Project Workflow → Document tab as a resource on the Resources tab.
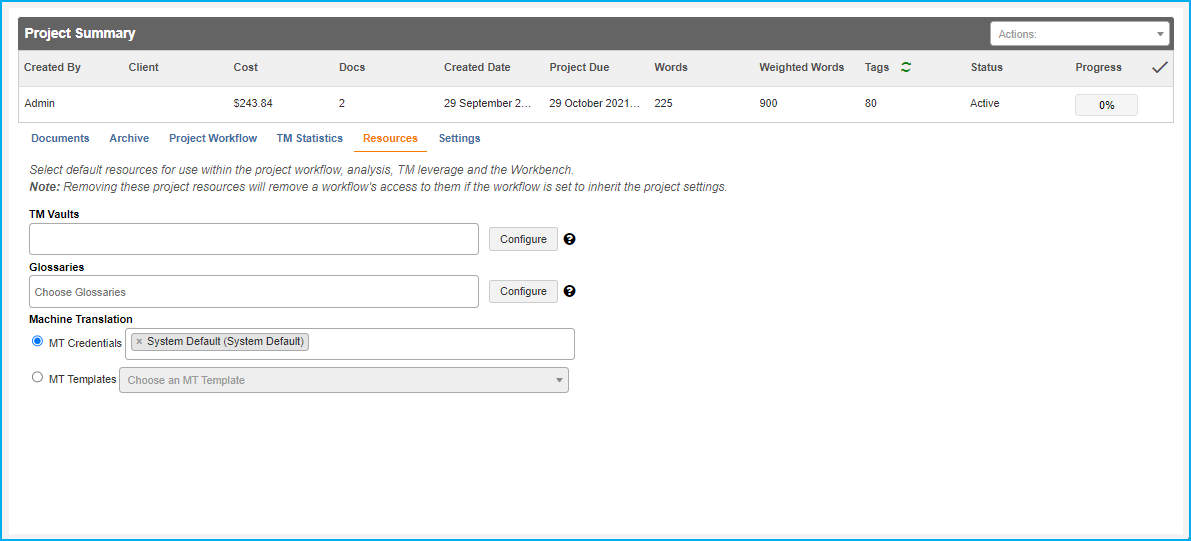 Image Removed
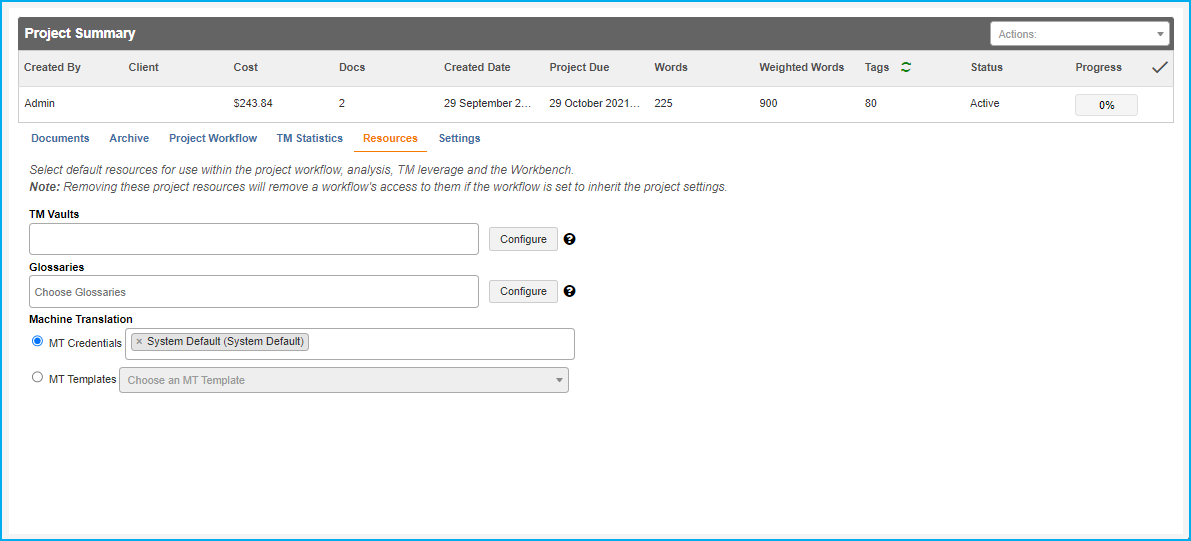 Image Added
To add a Save-To Vault as a project resource, follow these steps:
Open the project (Go to Projects and open the project)
Click on the Resources tab
Click inside the TM Vaults field.
Scroll to or type in the name of the Save-To Vault
Once the Save-To Vault is added as a language resource, new translation memory will be available to linguists in the Workbench immediately.
| Tip |
|---|
You can create a vault in the Projects menu at the top of the sidebar. |
Preserve white-listed in-line tags
When enabled, the Preserve white-listed in-line tags setting ensures that white-listed tags and tag patterns (see list below) are displayed as placeable tags in the Workbench. If left disabled, white-listed in-line tags at the start and end of the segment will not appear in the Workbench for placement. Enabling the Preserve white-listed in-line tags setting also affects documents uploaded via the API. Users can manually override the setting when uploading a document via the Project Management app.
| Info |
|---|
Tags which are adjacent to one another are sometime consolidated into a single placeable tag to simplify the translation process. When preserving white-listed tags, tag consolidation is disabled. |
White-listed tags and tag patterns
Tags that contain the following text are white-listed:
<code>
ac:link
ac:name="pname"
ac:name="CA Variables"
ac:name="Variable"
Tags matching the following patterns are white-listed:
Variables which start with the "@" character. An example is: @user
Curly brace variables. An example is: {1}
Square bracket variables. An example is: [Account]
Dollar variables where the first character after the dollar sign is a letter. An example is: $projectName
C-style printf codes. An example is: %2$d
On this page:
| Table of Contents | ||||
|---|---|---|---|---|
|
Related pages:
Need Support?
Visit the RAY Enterprise Support Center.