Versions Compared
| Version | Old Version 9 | New Version Current |
|---|---|---|
| Changes made by | ||
| Saved on |
Key
- This line was added.
- This line was removed.
- Formatting was changed.
Add a client to stay organized and to help you quickly find projects.
To add a client to a new project:
- Create the new project.
- Under Client Name,
- Click New to add a new client…
- …or scroll to select an existing client.
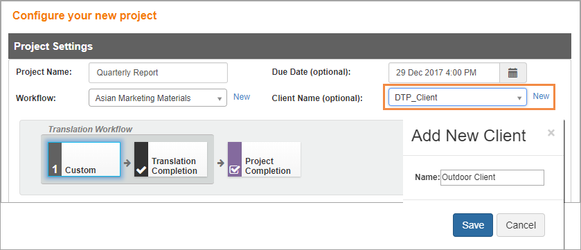
- The Client will be added to the project. You will be able to sort/find the project by client in the future.
Adding a Client to an Existing Project
To add a client to an existing project, start by creating the client and then adding it to the project.
Create the Client
To create a client:
- Go to the top of the page and select Project Resources > Clients.
- Click New Client.
- Type the name of the new client and click Save.
Add the Client
To add the client to the project:
- Open a project from the Projects menu.
- Click the project’s Settings tab (upper right).
- Under Project Details, click Edit.
- Scroll to select the new client.
Editing Client Names
If need to edit a client name, access the Client editing option from the main menu.
To edit a client name,
- Go to the main menu and select Project Resources > Clients.
- Click the name of the client you wish to edit.
- Switch to the Settings tab (above the list of projects).
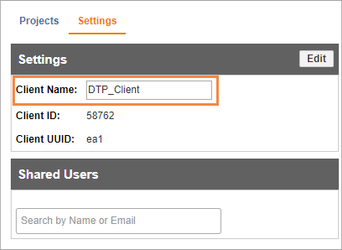
- Click Edit (upper right).
- Make your changes and click Save.
Viewing Client’s Projects
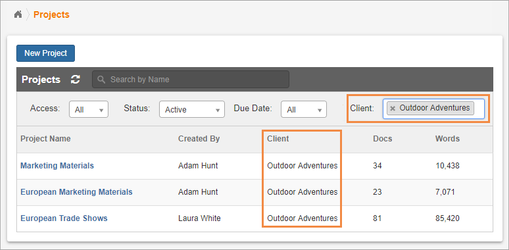
Once clients are added to a project, you will be able to organize projects by client.
To view all of the projects associated with a single client,
- Go to the main menu and select Project Resources > Clients.
- Click to select the client’s name.
- A list of all of the projects assigned to that client will display.
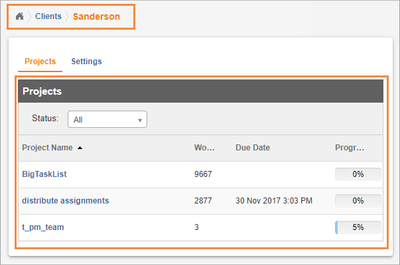
- Click a link to start managing a project.
Sharing Clients
When you add a client,
- Others can’t access the client under Project Resources > Clients.
- Others can’t add the client to new projects.
If you would like to share a Client with others, change the client permissions.
- Access Clients from the main menu.
Select Project Resources > Clients from the main menu. - Click the name of the client you wish to share.
- Switch to the Settings tab (above the list of projects).
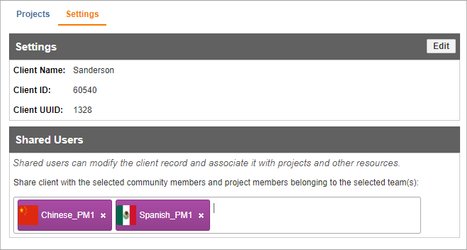
- Click Edit (upper right).
- Under Shared Users, type the name(s) of the Individual(s), team(s), and other groups that should have access to add the client.
- When you are ready, click Save.
| Live Search | ||||||
|---|---|---|---|---|---|---|
|
On this page:
Table of Contents
Need Support?
Visit the
Lingotek| Style |
|---|
#children-section {        display:none !important;    }
#comments-section {        display:none !important;    }
#likes-and-labels-container {        display:none !important;    }
.page-metadata {display:none;} |