Overview
We have created one simple a straightforward process for creating new projects and documents. Read the methods to initiate the process how to get started below.

Create a new project:

Select the “Add” icon next to the Projects header in the breadcrumb.
Select the Browse action on the Project list and select your documents. Choose the “Create new project” option in the select project drop-down. It is the first option in on the list.


Add documents to a project:
Select the browse action on the Project list and select your documents. Choose your desired project from the select project drop-down.
Drag and drop your file(s) on any of the project rows or cards on the project list.
Select the browse action inside a project and select your documents. The documents will be added Portal will add the documents to the current project you are currently in.
Drag and drop your file(s) onto the project’s document list.
If you are already on the Add Document or New Project page, you can drag and drop files anywhere on the page (except the reference materials section). You can browse for additional documents as well.
Creating Projects and Adding Documents
Initiate the process using any of the methods detailed above.
Add additional source files to the page.
Configure your project and document settings.
If desired, review our terms and conditions.
Select Submit.
You will be prompted The app will prompt you to choose between uploading additional documents or proceeding to opening your project.
Project and Document Settings
Read Please read the following to understand what each field means, how they are used, the fields mean and their impact.
Project Settings
Project Name* – Give your project a name that is an easily identifiable name.
Project Template* – Choose a project template to create the project with. You will see a list of all your community’s project templates.
Add Documents – You can choose whether or not to add documents at this point. If you do add documents, see details about the document settings below.
*Required Fields
| Info |
|---|
Note to organization admins If you give a user permission to create projects in Portal, they will be able to choose from all the project templates in your community. Make sure your project template names are descriptive to help content managers choose the right suitable template. |
Document Settings
Source Language* – Identify the source language of the documents that you are uploading. Please note that this will be the source language for all the files you are uploading.
Target Languages* – Select the language locales you want to translate your source files to be translated into.
If you create a new project, you will select the source and target files manually.
If you add files to an existing project, the source and target languages will be pre-filled for you based on the project’s workflow settings. You can edit if necessary.
Metadata fields – We have more than 20 metadata document metadata fields that you can use to further classify the your documents you are uploadingfurther.
Document Due Date** – Select the due date you want all translations returned to you by.
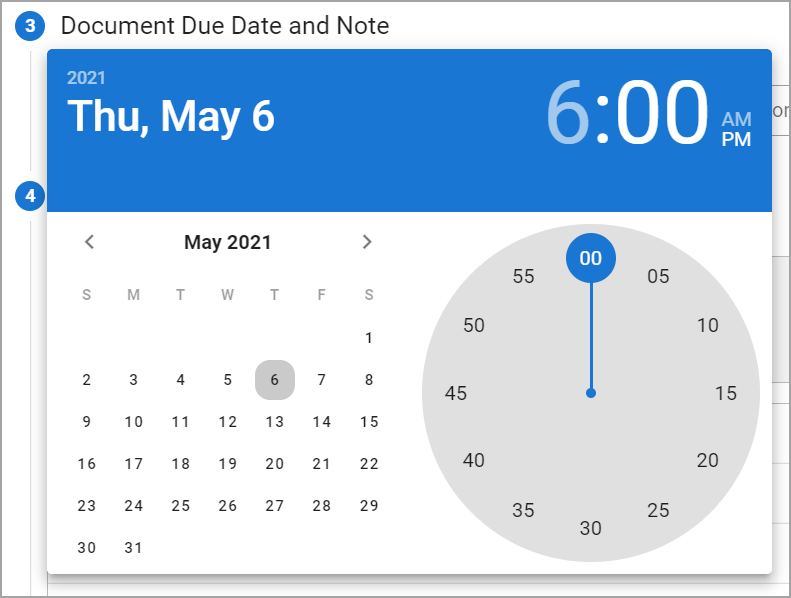
Note that this is a requested due date, and it may be overwritten by workflow due date configurations may overwrite it.
Document Note – Use this field to provide important instructions about the documents you are uploading. This note will be applied Portal will apply this note to all the files you are uploading.
Reference Materials – Reference materials are used to provide detailed instructions and context about the documents you are uploading to Lingotek.
To add reference materials:
Drag and drop files on the reference material section.
Select the browse button to find and select files from your device.
We accept a wide variety of file types as reference materials. Images, videos, PDFs, and more.
Reference materials cannot exceed 8GB.
*Required Fields
**The document due date may be required depending on your project settings
Other Settings and Details
ZIP files – Choose to upload ZIP files can be uploaded to Lingotek as a ZIP or an InDesign preflight package.
Portal uploads InDesign Packages (preflight packagepackages) are uploaded to the TMS as an individual document.
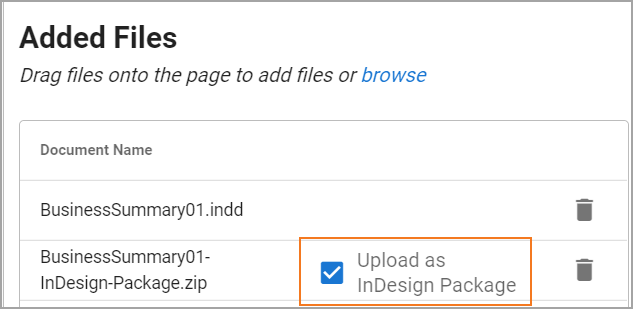
To treat it as a ZIP file, deselect the “Upload as InDesign Package” setting.
We will extract all the files from the ZIP file and translate each one of them separately. Files extracted from the ZIP file will not be grouped together in the
TMSThe TMS does not keep extracted files grouped.
If you want to keep them extracted files in a single group, create a project that is exclusive to the files for that ZIP.
SRT and WebVTT files – If you upload either of these files, you will see an option to add a video. To add a video, you can:
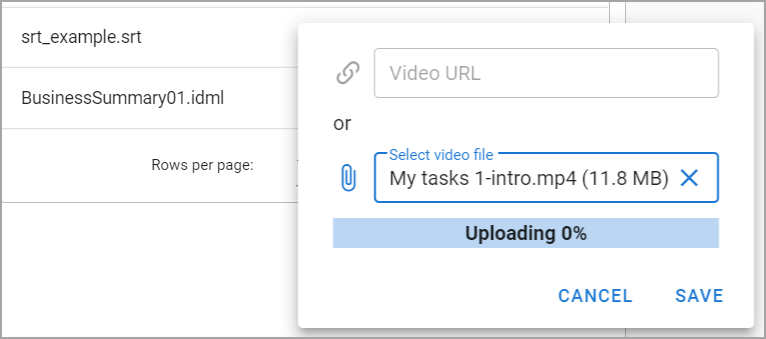
Provide a link to where a video is hostedyou are hosting the video.
Upload a video from your device.
Undetected file types – If our system cannot detect the file type, we prompt you will be prompted to select a file type to upload the file as.
Failed document uploads – If Portal cannot upload the document you selected cannot be uploaded to the system, you will see a red failure icon next to the document. This is most likely because the file type you attempted to upload is not supported by the TMSfailed process in the processes widget.
Removing files – To remove files you added by mistake, select the Delete icon at the end of the row.
On this page:
| Table of Contents |
|---|
Other key topics:
| Filter by label (Content by label) | ||||||||
|---|---|---|---|---|---|---|---|---|
|